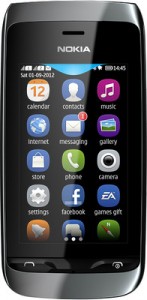
Nokia Asha 310
Today I swapped my aging 4 year old Nokia 5800 Xpress Music with Nokia Asha 310 (Dual SIM with WiFI) from a local mobile store. The phone after the swap cost me Rs 3600/-.
From last more than 8 months or so Android is my primary phone and prior to that for close to two year it was Blackberry. Along with these two devices I was using Nokia 5800 Xpress Music and another Nokia 500 for my second phone.
The primary requirement I had was to ensure that I find some way of syncing contacts with google contacts as my android is configured to do so. This provides me a backup of all my contacts at google and will ensure that I can enter/edit my contacts at one devices and they will be available everywhere. Also google provides ability to recover contacts (upto a certain amount of time) in case they are accidently deleted.
In order to sync contacts I used SyncML. Support for which is enabled by google from quite some time.
In order to configure Nokia Asha 310 to sync with google contacts, follow the following steps. We need to start with creating a personal configuration option first –
- settings -> configuration -> personal configuration -> add new
- Specify the account name. Anything will work here as it is just an identifier text entry, in case you are syncing from multiple sources. My account name is “Gmail Contacts”.
- server address should be https://m.google.com/syncml
- username must be your username including the domain name (e.g something@gmail.com). If you are using google apps then you should use that domain instead of gmail.com.
- password must be your password. You will be asked to enter it twice for verification.
- contacts database -> database address is the one which is important for us as we will be syncing with it. For Gmail (and Google Apps) you should specify ‘contacts’ here. There is no need to specify username and password again here.
- calendar database -> database address should have the value of ‘calendar’. In case you do not want to sync calendar you can leave it blank.
- notes database -> database address should have the value of ‘notes’. In case you do not want to sync notes you can leave it blank.
- use pref. acc. point – Set this to either ‘Yes’ or ‘No’. In case you set it to ‘No’ the you need to setup the access point values. I have set it to ‘Yes’, so that whatever my preferred access point at the time of sync is, will be used.
NOTE – Database names is a place where SyncML protocol lacks standardisation as different providers use different names, so you must know the database name in case you have a different provider.
Next the sync settings can be configured as below –
- Settings -> sync & backup -> sync with server -> sync settings
- synchronised data – select the databaes which needs to be synced here. I have all three databases viz. contacts, calendar and notes selected
- sync settings – Since this is a dual SIM phone, you will have to select either SIM1 or SIM2 and the select the configuration profile which you created above viz. ‘Gmail Contacts’.
- automatic sync – This can be set to daily, weekly, monthly or off modes. In case you set it to off then you need to initiate sync manually when you wish to sync the databases.
- rules for incoming – There are three possible values – Always allow, Always reject, Confirm first. The meanings are obvious. The first will always allow the incoming data and sync it, the second will always reject incoming data (in this case changes on your phone will be sent, but changes from google server will not be received) and confirm first will prompt for appropriate action each time. My setting is ‘Always allow’
- Settings -> sync & backup -> sync with server -> sync now can be used to initiate the manual sync.
Hope this post will help interested folks.
Like this:
Like Loading...


