Using Telegram for Automation Using Python Telethon Module

Telegram is a cloud based messaging application which provides an excellent set of APIs to allow developers to automate on top of the platform. It is increasingly being used to automate various notifications and messages. It has become a platform of choice to create bots which interact with users and groups.

Telethon is an asyncio Python 3 library for interacting with telegram API. It is one of the very exhaustive libraries which allows users to interact with telegram API as a user or as a bot.

Recently I have written some AWS Lambda functions to automate certain personal notifications. I could have run the code as a container on one of my VPSs or on Hulu or other platforms, but I took this exercise as an opportunity to learn more about serverless and functions. Also, my kind of load is something which can easyly fall under the Lambda free tier.

In this post we will look into the process of how to start with the development and write some basic python applications.

Registering As a Telegram Developer

Following steps can be followed to obtain the API ID for telegram –

  • Sign up for Telegram using any application
  • Login to the https://my.telegram.org/ website using the same mobile number. Telegram will send you a confirmation code on Telegram application. After entering the confirmation code, you will be seeing the following screen –
Screenshot of Telegram Core Developer Page
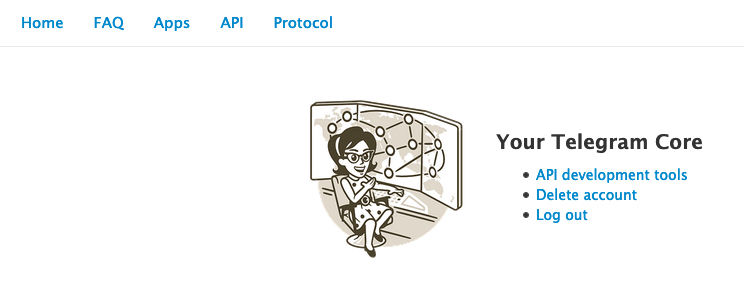
  • In the above screen select the API Development Tools and complete the form. This page will provide some basic information in addition to api_id and api_hash.

Setting up Telethon Development Environment

I assume that the reader is familiar with basic python and knows how to set up a virtual environment, so rather than explaining, I would more focus on quick code to get the development environment up and running.

$ mkdir telethon-dev && cd telethon-dev 
$ python3 -m venv venv-telethon
$ source venv-telethon/bin/activate
(venv-telethon) $ pip install --upgrade pip
(venv-telethon) $ pip install telethon
(venv-telethon) $ pip install python-dotenv

Obtaining The Telegram Session

I will be using .env file for storing the api_id and api_hash so that the same can be used in the code which we will write. Replace NNNNN with your api_id and XX with your api_hash

TELEGRAM_API_ID=NNNNN
TELEGRAM_API_HASH=XXXXXXXXXXXXXXXXXXXXXXXXXXXXXX

Next we will need to create a session to be used in our code. For full automation, it is needed that we store the session either as a file or as a string. Since the cloud environments destroy the ephimeral storage they provide, so I will get the session as a string. The following python code will help obtain the same.

#! /usr/bin/env python3

import os

from dotenv import load_dotenv

from telethon.sync import TelegramClient
from telethon.sessions import StringSession

load_dotenv()

with TelegramClient(StringSession(), os.getenv("TELEGRAM_API_ID"), os.getenv("TELEGRAM_API_HASH")) as client:
    print(client.session.save())

When this code is executed, it will prompt for your phone number. Here you would need to print the phone number with the country code. In the next step, an authorization code will be received in the telegram application which would need to be entered in the application prompt. Once the authorization code is typed correctly, the session will be printed as a string value on standard output. You would need to save the same.

(venv-telethon) $ ./get_string_session.py
 Please enter your phone (or bot token): +91xxxxxxxxxx
 Please enter the code you received: zzzzz
Signed in successfully as KKKKKK KKKKKKK
9vznqQDuX2q34Fyir634qgDysl4gZ4Fhu82eZ9yHs35rKyXf9vznqQDuX2q34Fyir634qgDyslLov-S0t7KpTK6q6EdEnla7cqGD26N5uHg9rFtg83J8t2l5TlStCsuhWjdzbb29MFFSU5-l4gZ4Fhu9vznqQDuX2q34Fyir634qgDysl9vznqQDuX2q34Fyir634qgDy_x7Sr9lFgZsH99aOD35nSqw3RzBmm51EUIeKhG4hNeHuF1nwzttuBGQqqqfao8sTB5_purgT-hAd2prYJDBcavzH8igqk5KDCTsZVLVFIV32a9Odfvzg2MlnGRud64-S0t7KpTK6q6EdEnla7cqGD26N5uHg9rFtg83J8t2l5TlStCsuhWjdzbb29MFFSU5=

I normally put the string session along with the API ID and Hash in the .env file. All these three values would need to be protected and should never be shared with a third party.

For the next code, I will assume that you have used a variable TELEGRAM_STRING_SESSION. So the final .env file will look like below –

TELEGRAM_API_ID=NNNNN
TELEGRAM_API_HASH=XXXXXXXXXXXXXXXXXXXXXXXXXXXXXX
TELEGRAM_STRING_SESSION=YYYYYYYYYYYYYYYYYYYYYYYYYYYYYYYYYYYYYY

Sending a Message to A Contact

Now we have the ground work done, so we will write a simple python application to send a message to a contact. The important point to note here is that the recipient must be in your telegram contacts.

#! /usr/bin/env python3

import os

from telethon.sync import TelegramClient
from telethon.sessions import StringSession
from dotenv import load_dotenv

load_dotenv()

try:
    client = TelegramClient(StringSession(os.getenv("STRING_TOKEN")), os.getenv("API_ID"), os.getenv("API_HASH"))
    client.start()
except Exception as e:
    print(f"Exception while starting the client - {e}")
else:
    print("Client started")

async def main():
    try:
        # Replace the xxxxx in the following line with the full international mobile number of the contact
        # In place of mobile number you can use the telegram user id of the contact if you know
        ret_value = await client.send_message("xxxxxxxxxxx", 'Hi')
    except Exception as e:
        print(f"Exception while sending the message - {e}")
    else:
        print(f"Message sent. Return Value {ret_value}")

with client:
    client.loop.run_until_complete(main())

Next Steps

The telethon API is quite versatile, a detailed API documentation can be find at https://tl.telethon.dev/. Hope this post will help the reader quickly start off with the telegram messaging with telethon module.

Posted in Automation, Programming, Tips/Code Snippets | Tagged , , , | 1 Comment

Adding Custom Python Packages for AWS Lambda Functions

Python is a popular language along with Javascript (NodeJS) for writing AWS lambda functions. Lambda function written in Python support the core modules, so one may choose to use the http.client instead of much simpler requests. However, if the function is to use some custom or non-native packages such as request and response we have few methods available to us.

In this article I will be discussing one such method of uploading a zip file containing all such custom packages and adding an AWS Lambda Layer to use this zip file for the particular function. We will be making use of Docker containers for this process. To be honest we actually do not need to go through the process of using a docker container. We can use only a simple pip install -t, zip the directory and upload it. However, certain python modules need to compile extensions written in C or C++. For such modules, the pip install -t approach will not work as the AWS Lambda functions use AWS Linux environment and you may have OSX, Windows or any other linux distribution of your choice. If you are sure that your modules do not have compiled extensions, please follow steps 2 and 3 below in this post.

Step 1 – Build and Run the Docker Container

The pre-requisite for this step is to have Docker installed. If you are on OSX, you can use Docker for Desktop. In this step we will use Amazon Linux base image and install desired version of python and few modules and OS packages. Amazon Linux 2 is a long term support release available at this moment. Amazon Linux 2 provides amazon-linux-extras which allows availability of newest application software on a stable base. At the time of writing this, Python 2.7 has been depricated by Amazon and the recommended version is Python 3.8. We would be needing to use amazon-linux-extras to install Python 3.8. Following Dockerfile is a very simple and self-explanatory file which we will be using to build our container –

FROM amazonlinux:2

RUN amazon-linux-extras enable python3.8 && \
          yum install -y python38 && \
          yum install -y python3-pip && \
          yum install -y zip && \
          yum clean all

RUN python3.8 -m pip install --upgrade pip && \
          python3.8 -m pip install virtualenv

Build the container using the following command –

$ docker build -f Dockerfile.awslambda -t aws_lambda_layer:latest

Once the container is built, it can be run as –

user1@macbook-air $ docker run -it --name aws_lambda_layer aws_lambda_layer:latest bash

This will give the bash shell inside the container. Next step will install the required modules in a python 3.8 virtual-environment and package as a zip file

Step 2 – Install Non-Native Packages and Package These As A Zip File

We will install the required packages inside a virtual environment, this will allow to reuse the same container for other future packaging also.

# python3.8 -m venv venv-telethon

Next, activate the virtual environment and install the packages in it under a specific folder, so that the same can be packaged. After packaging the folder, the zip file needs to be copied outside the container so that the same can be uploaded –

# source venv-telethon/bin/activate
(venv-telethon) # pip install telethon -t ./python
(venv-telethon) # deactivate

# zip -r python.zip ./python/

user1@macbook-air $ docker cp aws_lambda_layer:python.zip ./Desktop/

Step 3 – Upload the Package to the AWS Lambda Layer or S3

If the zip file is more than 50 MB, it has to be uploaded to Amazon S3 store. In case you decide to upload it S3 store, ensure that the path of the file is recorded carefully.

To upload the file, under the Lambda->Layer, click on Create Layer and fill up the form. The form will allow to upload the zip file or specify the path of the AWS S3 location where the file is uploaded.

Now write your lambda function and use the modules which were uploaded as a part of the zip file.

Posted in Containers, Programming | Tagged , , , , | Leave a comment

Get Oracle XE-ORDS-APEX Up and Running Quickly with Ansible

Oracle APEX is a rapid application development tool and from what I have seen its quite powerful. Clubed together with ORDS, it is a powerful tool to develop enterprise applications which are highly scalable, provided you are willing to spend $$$$ as everything depends on underlying Oracle Database.

For those who want to learn the tool, Oracle XE (Express Edition) can be used as a development environment. Setting up the full stack can be a little bit challenging for developers who wants to stick to building their core strength and not mess with infrastructure deployments etc.

To help here, I wrote this ansible playbook, which will quickly setup the entire stack. Accompanied in the git repository are the Vagrantfile which can quickly setup the DEV environment in a VirtualBox VM. The stack is currently based on CentOS 7.x (and can run in RHEL 7.x as well).

The README file in the git repostory is self explanatory and explains in detail on how to use this playbook to get the stack up and running.

Upcoming Enhancements

I will be making suitable modifications in to make it run on RHEL 8.x and Oracle Linux 8.x. I will also be working on fixing the accompanied packer file which has not been tested thoroughly for building a Docker Image. I plan to get a packer file in place to build a VirtualBox box file, a Digital Ocean droplet image, and a Docker build.

Keep watching the GitHub repository for the changes and do report any issues or feature enhancements. Feel free to submit PRs in case you get to the planned enhancements before me.

Posted in Automation, Databases | Tagged , , | Leave a comment

Upgrading Raspbian 8 (Jessie) to Raspbian 9 (Stretch)

I decided to upgrade my oldest Raspberry Pi to the latest Raspbian. Since I was two releases behind, I decided to do it step-by-step. Today I updated from 8 – 9. I plan. to perform similar steps to upgrade 9 – 10.

Following are the quick sequence of steps I followed to perform the upgrade. This is a Model B Rev 2 Pi, so was considerably slow to update and took me more than 4 hours to complete.

Step 1 – Prepare The System For Upgrade

Apply the latest updates to the system.

$ sudo apt update && sudo apt upgrade -y && sudo apt-get dist-upgrade -y

Next step is to search for packages which have been only partially installed on the system using dpkg -C command.

$ sudo dpkg -C

The dpkg may indicate what needs to be done with these. I did not find anything under this category, which was good. In last, I ran apt-mark showhold command to get a list of all packages which have been marked as hold.

$ sudo apt-mark showhold

While I did not get any packages in this list, but if there are any, we are expected to resolve this before proceedig to step 2.

Stpe 2 – Prepare the APT System for Upgrade

$ sudo sed -i 's/jessie/stretch/g' /etc/apt/sources.list
$ sudo sed -i 's/jessie/stretch/g' /etc/apt/sources.list.d/raspi.list
$ echo 'deb http://archive.raspberrypi.org/debian/ stretch main' >> /etc/apt/sources.list

I am updating only the two files but if your system has any other source files, then you need to update them appropriately as well. A list of such files can be found using – grep -lnr jessie /etc/apt

In addition to this I also removed the package apt-listchange which displays what changed in the new version of the Debian package as compared to the version currently installed on the system. This is expected to speed-up the entire process. This is not mandatory, so you can skip it.

# optional step
$ sudo apt-get remove apt-listchange 

Step 3 – Perform The Upgrade and Cleanup

As a last step initiate the upgrade process. This is the time where you can just leave the system for few hours.

$ sudo apt update && sudo apt upgrade -y && sudo apt-get dist-upgrade -y

I faced issues with chromium-browser and at the last command (dist-upgrade), the dpkg bailed out with a message indicating archive corruption of chromium-browser package. Since I am at Run Level 3, and do not need chromium on the headless pi, I decided to remove the following three packages. In any case in the absence of chromium, the debian system will automatically use update-alternatives and choose epiphany-browser to satisfy gnome-www-browser requirement.

$ sudo apt-get remove chromium-browser chromium-browser-l10n rpi-chromium-mods

After removing the chromium browser, I did another round of update, upgrade and dist-upgrade, just to make sure before initiating the cleanup as below –

$ sudo apt-get autoremove -y && sudo apt-get autoclean

The new OS version can be verified by

$ cat /etc/debian_version;cat /etc/os-release

I also took this opportunity to update the firmware of the raspberry pi by running the following command. Please note this step is absolutely optional and it is recomended also that do not perform this unless you know what you are doing or you are being asked by a support person.

$ sudo rpi-update

Posted in FLOSS, RaspberryPi, Tips/Code Snippets | Tagged , | Leave a comment

Raspberry Pi – rsyslog fixes on Raspbian 8 (Jessie)

One of my Raspberry Pi (Raspberry Pi Model B Rev 2) is running quite old versio of Rasbian – although fully updated and patched. Today while checking the syslog on my raspberry pi, I noticed the following error which was very frequently – almost every minute and thus was filling up the syslog.

Dec 24 20:59:35 rads rsyslogd-2007: action 'action 17' suspended, next retry is Thu Dec 24 21:01:05 2020 [try http://www.rsyslog.com/e/2007 ]

Thanks to logrotate I was not in an immediate need for action, but still I thought it will be better to fix this – atleast that will reduce the write and increase life of my SD Card.

The URL at the end of the message was very helpful. According to the specified URL this message simply means that rsyslog.conf contains the instruction to write to the xconsole pipe, but this pipe is never read. on editing the /etc/rsyslog file, the following section can be commented out or removed completely.

daemon.*;mail.*;\        news.err;\        *.=debug;*.=info;\        *.=notice;*.=warn       |/dev/xconsole

A simple systemctl restart rsyslog after that will fix the issue.

I did not see this issue on my other Raspberry Pi which runs Raspbian based on Debian Buster (Debian 10). I checked the /etc/rsyslog.conf on that and could not find the offending lines there. So my understanding is that this issue is with Raspbian based on Jessie.

Posted in FLOSS, RaspberryPi, Tips/Code Snippets | Tagged , | Leave a comment