Ajitabh Pandey's Soul & Syntax

Exploring systems, souls, and stories – one post at a time

Tag: SysAdmin

  • Why Unix Doesn’t Kill Your Children (and Why That’s a Feature)

    Last week my live-streaming transcoder started dying mid-session. The publisher would get disconnected, reconnects would fail, and the only cure was restarting nginx entirely. While poking around during one of these incidents, I ran ps aux and saw this:

    root      814231  2.1  1.8 ... SL   12:04   3:11 /usr/bin/ffmpeg -i rtmp://127.0.0.1:1935/...
    root      814232  2.3  1.9 ... SL   12:04   3:19 /usr/bin/ffmpeg -i rtmp://127.0.0.1:1935/...
    root      815544  1.9  1.8 ... SLl  12:31   1:02 /usr/bin/ffmpeg -i rtmp://127.0.0.1:1935/...
    

    Multiple ffmpeg processes, all in sleeping state, from sessions that should have been long dead. nginx had “killed” the transcoder when the publisher disconnected. So why were these still here?

    Because I had forgotten one of the oldest facts about Unix, and it’s worth writing down so I don’t forget it again:

    When a parent process dies, the kernel does not kill its children.

    What actually happens

    My setup used nginx-rtmp’s exec_push to launch a shell script, and the script launched ffmpeg:

    nginx worker
      └── bash ffmpeg_transcode.sh live
            └── ffmpeg -i rtmp://... (the actual work)
    

    When the publisher disconnects, nginx-rtmp sends a kill signal to the process it spawned — the bash script. Bash dies. And ffmpeg?

    The kernel does exactly one thing with an orphaned child: it reparents it — traditionally to PID 1, or to the nearest “subreaper” (on modern systems, often systemd). That’s it. Nobody sends it a signal. ffmpeg keeps running, holding its RTMP publish sessions open, blocked on an input stream that will never send another byte. That’s the SL state, sleeping, waiting forever.

    The cascade from there was my whole outage: the encoder auto-reconnects, nginx fires the script again, the new ffmpeg tries to publish to stream names the ghost ffmpeg still owns, nginx-rtmp rejects the duplicate publish, and the new session produces nothing. Every retry fails until you restart nginx, which finally tears down the ghosts.

    Why the kernel behaves this way

    My first instinct was “this is an OS bug waiting to happen, surely the parent’s death should cascade.” It’s not a bug. It’s the design, and half of Unix depends on it.

    In Unix, the parent–child relationship is bookkeeping, not ownership. A child is a fully independent process with its own PID, file descriptors, and lifetime. The parent’s only special privilege is the right (and duty) to collect the child’s exit status with wait(). Reparenting exists purely so that someone is always around to do that collection, otherwise every orphan would become a permanent zombie.

    Killing children on parent death would break, at minimum:

    • Every daemon ever written. The classic daemonization recipe is literally “fork, then let the parent exit” — the child surviving its parent is the entire point.
    • nohup and long-running jobs. Start a build over SSH, connection drops, build keeps going.
    • Your desktop. Launch a browser from a terminal, close the terminal, browser stays up.

    “But shouldn’t a well-behaved parent clean up?”

    Yes, and this is the part that matters in practice. A parent that wants to manage its children should catch the termination signal, forward it to its children (or its process group), wait for them, and then exit. Bash can do this with trap.

    Here’s the catch that sank me: nginx-rtmp kills its exec children with SIGKILL, and SIGKILL cannot be caught. No trap ever runs. Bash is vaporized instantly, mid-thought, with no opportunity to pass anything on to ffmpeg.

    The mechanisms that do provide cascade-kill behavior all exist precisely because the default doesn’t, and every one of them is opt-in:

    • Process groups — send a signal to -PGID and everyone in the group gets it. But the killer has to choose to do this; nginx-rtmp doesn’t.
    • cgroups — systemd kills every process in a unit’s cgroup on stop. Great, if your process tree lives in a unit.
    • prctl(PR_SET_PDEATHSIG, ...) — Linux-specific; a child can request “send me SIGTERM when my parent dies.” The child has to ask.

    The one-word fix

    Since I couldn’t make nginx kill smarter, I removed the process it was killing wrong. In the shell script, this:

    /usr/bin/ffmpeg -i "rtmp://127.0.0.1:1935/esatsang/$1" ... 
    

    became this:

    exec /usr/bin/ffmpeg -nostdin -i "rtmp://127.0.0.1:1935/esatsang/$1" ...
    

    The bash builtin exec doesn’t fork a child, it replaces the shell process with ffmpeg, same PID. The script stays readable, multi-line, full of comments. But now the process nginx tracks is ffmpeg, and its SIGKILL lands exactly where it should.

    The verification was satisfying. Kill the stream from the encoder side and watch:

    watch -n1 'ps aux | grep [f]fmpeg'
    

    ffmpeg vanishes within a second of the disconnect. The reconnect spawns a fresh one. No ghosts, no duplicate-publish rejections, no nginx restarts at 11pm.

    The takeaway

    If you ever see orphaned workers surviving their supervisor, don’t blame the kernel — it’s doing exactly what forty years of Unix software expects it to do. Ask instead: who is actually receiving the kill signal? If the answer is “a wrapper script,” the fix is probably one word long.


    Next time a process “refuses to die,” check ps -o pid,ppid,stat,cmd — if PPID is 1 and it shouldn’t be, you’ve got an orphan, and somewhere upstream a wrapper ate a signal meant for someone else.

  • Blocking Metadata Access: A Simple SSRF Hardening Win

    Blocking Metadata Access: A Simple SSRF Hardening Win

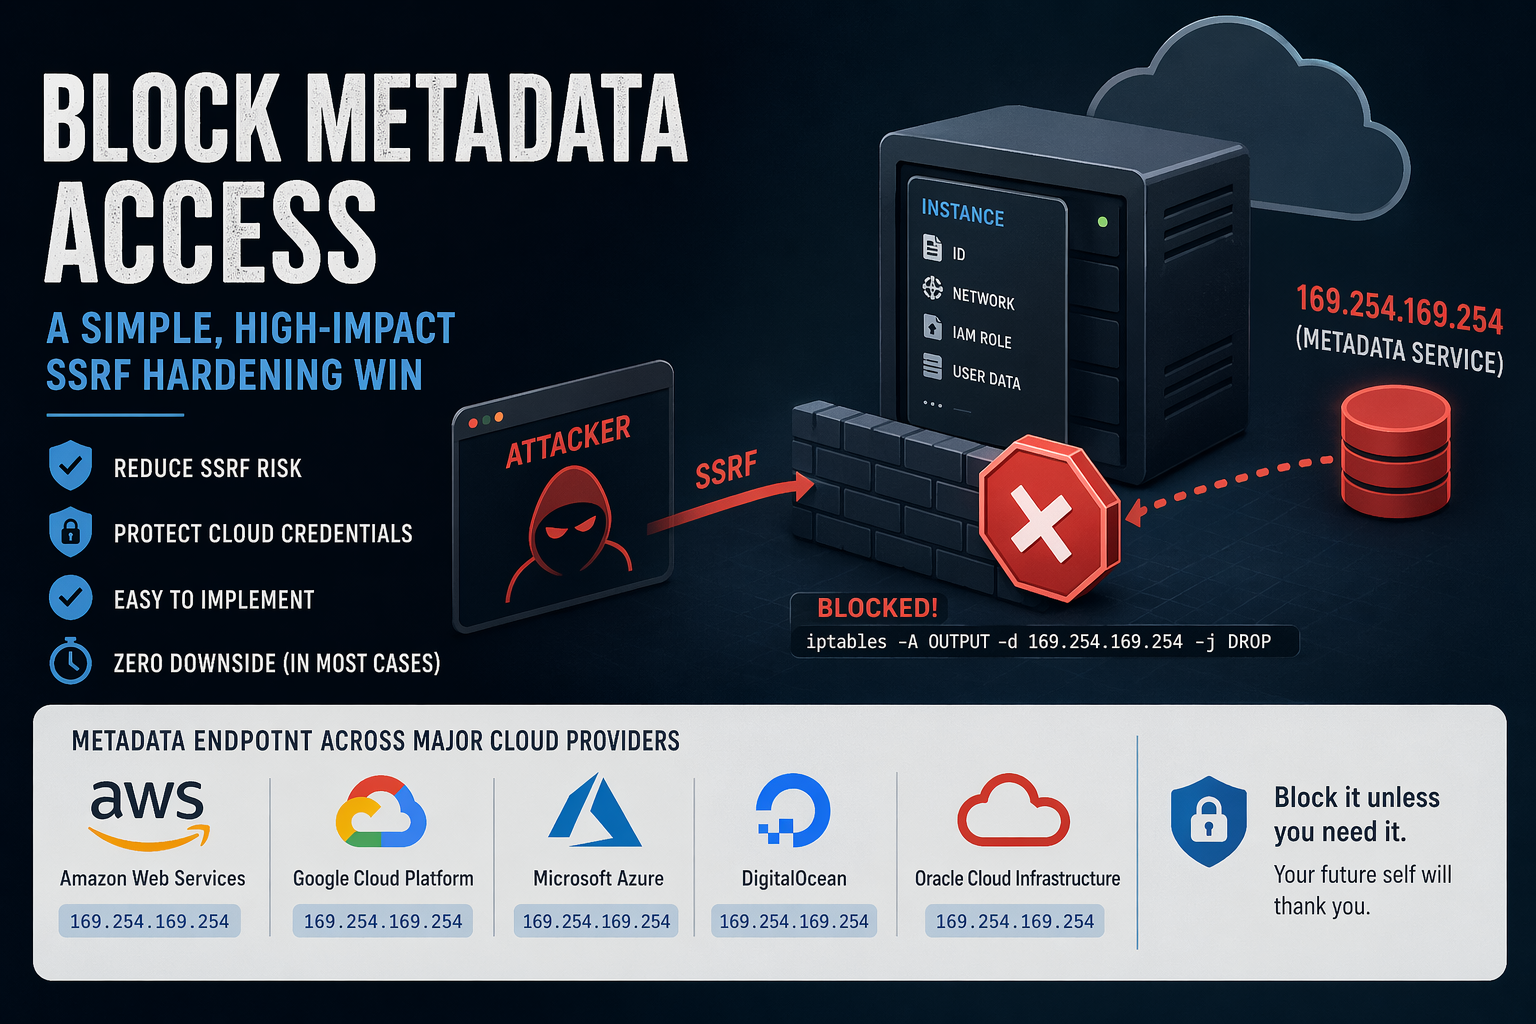
    If you’re running infrastructure on cloud platforms, there’s a quiet but powerful security control you can apply with almost no downside: block access to the instance metadata service (IMDS) from your workloads.

    I recently applied this on a couple of authoritative DNS nodes running on DigitalOcean, and it’s one of those rare changes that’s both low-risk and high-value.

    This blog post explains what is it and how to go about it.

    What is Instance Metadata?

    Most cloud providers expose a metadata service to instances (VMs). This is a local HTTP endpoint that lets the VM retrieve information about itself, such as:

    • Instance ID, hostname
    • Network configuration
    • SSH keys (sometimes)
    • IAM credentials (on some platforms)

    This service is not on the public internet. Instead, it’s exposed via a link-local IP address, meaning it’s only reachable from within the instance.

    The most commonly used metadata IP:

    169.254.169.254

    This address is part of the link-local range (169.254.0.0/16) and is widely adopted across cloud providers.

    Why is Metadata Access Dangerous?

    By itself, metadata access is not inherently bad, it’s useful for bootstrapping.

    The problem arises when you combine it with SSRF (Server-Side Request Forgery) vulnerabilities.

    The Risk Scenario

    If an attacker can trick your application into making HTTP requests (e.g., via SSRF), they may be able to:

    1. Access http://169.254.169.254
    2. Query metadata endpoints
    3. Extract sensitive data like:
      • Temporary credentials (e.g., IAM roles on Amazon Web Services)
      • Internal configuration

    This has been the root cause of several real-world breaches.

    • The Capital One data breach is the canonical example: an SSRF vulnerability was used to access the AWS Instance Metadata Service and extract credentials, ultimately exposing data of over 100 million customers
    • Security research consistently shows that IMDS (especially IMDSv1) can act as a “skeleton key,” allowing attackers to pivot from a simple SSRF bug to full cloud account compromise
    • A 2025 large-scale campaign specifically targeted EC2 instances by abusing metadata endpoints to steal credentials via SSRF
    • More recent vulnerabilities (e.g., CVE-2026-39361) explicitly note that attackers can retrieve IAM credentials from AWS, GCP, or Azure metadata services once SSRF is achieved
    • Industry threat reports confirm this is ongoing: attackers have been observed systematically exploiting metadata services at scale to steal credentials

    So, the metadata endpoints turn a “minor” SSRF bug into credential theft, privilege escalation, and full infrastructure compromise.

    Why Blocking It Makes Sense

    For many workloads, especially dedicated infrastructure nodes like:

    • Authoritative DNS servers
    • Reverse proxies
    • Stateless services

    there is no legitimate need to access metadata after provisioning.

    So blocking it gives you:

    • SSRF blast-radius reduction
    • Defense-in-depth
    • Zero operational impact (in most cases)

    How to Block Metadata Access (iptables)

    The simplest approach: deny outbound traffic to 169.254.169.254

    Basic Rule

    iptables -A OUTPUT -d 169.254.169.254 -j DROP

    With Logging (Optional)

    iptables -A OUTPUT -d 169.254.169.254 -j LOG --log-prefix "IMDS BLOCK: "
    iptables -A OUTPUT -d 169.254.169.254 -j DROP

    If You Use Default-Deny Outbound (Recommended)

    If you already enforce a strict outbound policy:

    # Ensure metadata is explicitly blocked
    iptables -A OUTPUT -d 169.254.169.254 -j REJECT

    nftables Equivalent

    nft add rule inet filter output ip daddr 169.254.169.254 drop

    Common Metadata IPs Across Cloud Providers

    While my own usage is mostly limited to DigitalOcean and Amazon Web Services Lightsail, a quick survey of other major platforms shows a consistent design choice: the same metadata endpoint (169.254.169.254) is used across Amazon Web Services, Google Cloud Platform, Microsoft Azure, DigitalOcean, and Oracle Cloud Infrastructure.

    NOTE – Blocking this single IP covers almost all major platforms.

    When Not to Block It

    There are a few scenarios where you should be careful:

    • Instances relying on dynamic IAM credentials (common in Amazon Web Services)
    • Auto-scaling systems fetching config at runtime
    • Agents that depend on metadata (monitoring, provisioning)

    If unsure, monitor before blocking:

    iptables -A OUTPUT -d 169.254.169.254 -j LOG

    Then review logs for a few days.

    A Practical Rule of Thumb

    • Infra nodes (DNS, proxies, load balancers): Block it
    • App servers with IAM roles: Evaluate carefully
    • Minimal/static workloads: Block it

    Final Thoughts

    Blocking metadata access is one of those rare controls that:

    • Takes minutes to implement
    • Requires no architectural change
    • Meaningfully reduces risk

    If you’re already running a default-deny outbound firewall, this should be part of your baseline.

    If not, this is a great place to start.

  • When a 2-Core Server Hits Load 45+: A Real-World LAMP Debugging Story

    A visual metaphor of a server under pressure: a small machine overwhelmed by tangled cables and glowing red signals, transforming into a clean, efficient system with smooth flowing connections and green indicators. Minimalist, modern, tech illustration style.

    There’s a particular kind of panic that sets in when you SSH into a production server and see this:

    load average: 45.63, 38.37, 28.93

    On a 2-core machine, that’s not just high — it’s catastrophic.

    I usually help one of my friends with LAMP servers hosted on DigitalOcean that run WooCommerce. The site brings in good sales for his business. Recently, he reached out to me to say that some of his customers reported slow order placement. When I logged into the server, I found an interesting pattern.

    This post walks through a real debugging session using a symptoms → diagnostics → solution approach. Along the way, we’ll uncover multiple overlapping issues (not just one), fix them step by step, and explain why architectural changes like PHP-FPM and Nginx matter.

    Symptoms: What went wrong

    The server started showing:

    • Extremely high load averages (45+ on a 2-core system)
    • Slow or unresponsive web requests
    • CPU is constantly maxed out
    • Intermittent recovery followed by spikes

    Initial snapshot:

    # uptime
    load average: 5.95, 25.07, 25.33
    
    # nproc
    2

    Even after partial recovery, the load remained unstable.

    Diagnostics: What the system revealed

    1. Top CPU consumers

    # ps aux --sort=-%cpu | head -20

    Output (trimmed):

    root          92 35.8  0.0      0     0 ?        S    12:40  82:49 [kswapd0]
    mysql     198808 18.6 10.9 1821488 439632 ?      Ssl  16:29   0:31 /usr/sbin/mysqld
    www-data  197164  5.6  5.1 504092 205036 ?       S    16:16   0:51 /usr/sbin/apache2

    The key observation from this is that the process kswapd0 is consuming 35% CPU. This is not normal. It means the kernel is struggling with memory pressure.

    2. Apache process explosion

    # ps aux | grep apache | wc -l
    14

    RSS is the actual physical RAM a process is using right now, measured in KB. It does NOT include swapped-out memory, so it represents memory currently resident in RAM. It is the single most important metric for sizing concurrency.

    In the output, I saw that the RSS is approximately 200MB – 260MB for each Apache process.

    So for 14 processes it is:

    14 processes × ~220MB ≈ ~3GB RAM

    On a 4GB system, that’s quite high.

    3. MySQL check (surprisingly clean)

    When I checked the full process list on the MySQL

    mysql> SHOW FULL PROCESSLIST;

    I found it clean, with a few sleep connections and no long-running queries. I verified it with

    # mysqladmin processlist

    and found a similar output. So MySQL wasn’t the bottleneck.

    4. Network state – hidden problem

    The netstat revealed a hidden problem that may be contributing to the sluggishness.

    # netstat -ant | awk '{print $6}' | sort | uniq -c
    .....
    121 SYN_RECV
    .....

    This indicates:

    • Many half-open TCP connections
    • Likely bot traffic or SYN flood behavior

    5. System pressure via vmstat

    In this case, vmstat was the most powerful tool run. In the output,

    • r is the number of runnable processes (waiting for CPU). Ideally, it should have a value less than or equal to the number of CPU cores. A value exceeding the number of available CPU cores on the machine would indicate CPU contention.
    • id indicates a percentage of CPU that is idle. A value typically in the range of 70-100% indicate a relaxed system. A low value (say 0-20%) indicates a busy CPU. However, 0% means it is fully saturated.
    • si and so are swapped in and out. A value of 0 indicates no swapping and is considered good. Occasionally, a value > 0 indicates mild pressure. But if this value remains above 0 continuously, it may indicate memory problems.

    So when I ran:

    # vmstat 1 5

    Output (trimmed):

    r  b   swpd   free   si   so us sy id
    14 0      0 399400   0    0 34 29 35
    15 0      0 362864   0    0 87 12  0

    r with a value of 14-15 indicates too many runnable processes, and id with 0 means CPU is fully saturated.

    After initial fixes, when I ran vmstat again, I saw the new numbers:

    r  b   swpd   free   si   so us sy id
    1  0  12120 2554084   0    0 34 29 35
    0  0  12120 2554084   0    0  0  1 99

    So, now a value of r between 0-2 indicates a healthy condition, an id of 86-89% indicate idle CPU, and a si/so of 0 indicates no swapping.

    • r = 0–2 → healthy
    • id = 86–99% → CPU idle
    • si/so = 0 → no swapping

    Three Root Causes

    This wasn’t a single issue. It was a stacked failure:

    1. Apache (mod_php) memory bloat

    • Each request = full Apache process
    • Each process ≈ 200MB+
    • Too many workers → RAM exhaustion

    2. Swap thrashing (kswapd0)

    • Memory filled up
    • Kernel started reclaiming memory
    • CPU burned by swap management

    3. Connection pressure (SYN_RECV flood)

    • 121 half-open connections
    • Apache workers are tied up waiting

    Solutions Applied

    1. SYN flood mitigation (UFW + kernel)

    I enabled:

    net.ipv4.tcp_syncookies=1

    And:

    ufw limit 80/tcp
    ufw limit 443/tcp

    2. Apache concurrency control

    Reduced workers:

    MaxRequestWorkers 6

    This helped stabilize the CPU with no process pile-up

    3. KeepAlive tuning

    KeepAlive On
    MaxKeepAliveRequests 50
    KeepAliveTimeout 2

    4. OPcache verification and tuning

    When PHP runs a script, it parses PHP code, compiles it into bytecode, and executes it. Without OPcache, this happens on every request.

    With OPcache enabled, compiled bytecode is stored in memory so that future requests can reuse it. Without OPcache, high CPU usage and slower response times are expected. With OPcache, 30-35% less CPU is used, and execution is faster.

    When I checked, I found that OPcache (opcache.enable) was already enabled in the php.ini.

    I improved it with more cache:

    opcache.memory_consumption=192
    opcache.interned_strings_buffer=16
    opcache.max_accelerated_files=20000

    Additional Changes I would like to make

    1. Replace mod_php with PHP-FPM

    I would want to replace mod_php with php-fpm. In mod_php, each Apache process embeds PHP, leading to high memory usage (~200 MB per worker). This results in poor scalability and a lack of separation of concerns.

    PHP-FPM, on the other hand, runs as a separate service and has lightweight workers (~20-40 MB), providing better process control and supporting pooling and scaling. This will result in lower memory usage, better CPU efficiency, and more predictable performance.

      2. Prefer Nginx Over Apache

      Now, this is not about nginx hype; it’s about an architectural choice. I have been using Apache for quite some time and love it. The pre-fork model of Apache has a process/thread per connection, is memory-heavy, and struggles under concurrency.

      Nginx, with its event-driven model, can handle thousands of connections with a few processes and non-blocking I/O, making it an ideal choice for modern web workloads.

      Finally

      What looked like a “CPU problem” turned out to be:

      • Memory exhaustion
      • Connection pressure
      • Poor process model

      Fixing it required layered thinking, not just tweaking one parameter.

      And the biggest lesson?

      One can tune one’s way out of trouble temporarily, but the real win comes from choosing the right architecture.

      So, now, if you’ve ever seen load averages that made no sense, this pattern might look familiar. And now you know exactly how to break it down.

    1. From /etc/hosts to 127.0.0.53: A Sysadmin’s View on DNS Resolution

      If you’ve been managing systems since the days of AT&T Unix System V Release 3 (SVR3), you remember when networking was a manual affair. Name resolution often meant a massive, hand-curated /etc/hosts file and a prayer.

      As the Domain Name System (DNS) matured, the standard consolidated around a single, universally understood text file: /etc/resolv.conf. For decades, that file served us well. But the requirements of modern, dynamic networking, involving laptops hopping Wi-Fi SSIDs, complex VPN split-tunnels, and DNSSEC validation, forced a massive architectural shift in the Linux world, most notably in the form of systemd-resolved.

      Let’s walk through history, with hands-on examples, to see how we got here.

      AT&T SVR3: The Pre-DNS Era

      Released around 1987-88, SVR3 was still rooted in the hosts file model. The networking stacks were primitive, and TCP/IP was available but not always bundled. I still remember that around 1996-97, I used to install AT&T SVR3 version 4.2 using multiple 5.25-inch DSDD floppy disks, then, after installation, use another set of disks to install the TCP/IP stack. DNS support was not native, and we relied on /etc/hosts for hostname resolution. By SVR3.2, AT&T started shipping optional resolver libraries, but these were not standardized.

      # Example /etc/hosts file on SVR3
      127.0.0.1 localhost
      192.168.1.10 svr3box svr3box.local

      If DNS libraries were installed, /etc/resolv.conf could be used:

      # /etc/resolv.conf available when DNS libraries were installed
      nameserver 192.168.1.1
      domain corp.example.com

      dig did not exists then, and we used to use nslookup.

      nslookup svr3box
      Server: 192.168.1.1
      Address: 192.168.1.1#53

      Name: svr3box.corp.example.com
      Address: 192.168.1.10

      Solaris Bridging Classical and Modern

      When I was introduced to Sun Solaris around 2003-2005, I realized that DNS resolution was very well structured (at least compared to the SVR3 systems I had worked on earlier). Mostly, I remember working on Solaris 8 (with a few older SunOS 5.x systems). These systems required both /etc/resolv.conf and /etc/nsswitch.conf

      # /etc/nsswitch.conf
      hosts: files dns nis

      This /etc/nsswitch.conf had only the job of instructing the libc C library to look in /etc/hosts, then DNS, and then NIS. Of course, you can change the sequence.

      The /etc/resolv.conf defined the nameservers –

      nameserver 8.8.8.8
      nameserver 1.1.1.1
      search corp.example.com

      Solaris 11 introduced SMF (Service Management Facility), and this allowed the /etc/resolv.conf to auto-generate based on the SMF profile. Manual edits were discouraged, and we were learning to use:

      svccfg -s dns/client setprop config/nameserver=8.8.8.8
      svcadm refresh dns/client

      For me, this marked the shift from text files to managed services, although I did not work much on these systems.

      BSD Unix: Conservatism and Security

      The BSD philosophy is simplicity, transparency and security-first.

      FreeBSD and NetBSD still rely on /etc/resolv.conf file and the dhclient update the file automatically. This helps in very straightforward debugging.

      cat /etc/resolv.conf
      nameserver 192.168.1.2

      nslookup freebsd.org

      OpenBSD, famous for its “secure by default” stance, includes modern, secure DNS software like unbound in its base installation; its default system resolution behavior remains classical. Unless the OS is explicitly configured to use a local caching daemon, applications on a fresh OpenBSD install still read /etc/resolv.conf and talk directly to external servers. They prioritize a simple, auditable baseline over complex automated magic.

      The Modern Linux Shift

      On modern Linux distributions (Ubuntu 18.04+, Fedora, RHEL 8+, etc.), the old way of simply “echoing” a nameserver into a static /etc/resolv.conf file is effectively dead. The reason for this is that the old model couldn’t handle race conditions. If NetworkManager, a VPN client, and a DHCP client all tried to write to that single file at the same time, the last one to write won.

      In modern linux systems, systemd-resolved acts as a local middleman, a DNS broker that manages configurations from different sources dynamically. The /etc/resolv.conf file is no longer a real file; it’s usually a symbolic link pointing to a file managed by systemd that directs local traffic to a local listener on 127.0.0.53.

      systemd-resolved adds features like –

      • Split-DNS to help route VPN domains seperately.
      • Local-Caching for faster repeated lookups.
      • DNS-over-TLS for encrypted queries.
      ls -l /etc/resolv.conf
      lrwxrwxrwx 1 root root 39 Dec 24 11:00 /etc/resolv.conf -> ../run/systemd/resolve/stub-resolv.conf

      This complexity buys us features needed for modern mobile computing: per-interface DNS settings, local caching to speed up browsing, and seamless VPN integration.

      The modern linux systems uses dig and resolvectl for diagnostics:

      $ dig @127.0.0.53 example.com

      ; <<>> DiG 9.16.50-Raspbian <<>> @127.0.0.53 example.com
      ; (1 server found)
      ;; global options: +cmd
      ;; Got answer:
      ;; ->>HEADER<<- opcode: QUERY, status: NOERROR, id: 17367
      ;; flags: qr rd ra; QUERY: 1, ANSWER: 2, AUTHORITY: 0, ADDITIONAL: 1

      ;; OPT PSEUDOSECTION:
      ; EDNS: version: 0, flags:; udp: 1232
      ;; QUESTION SECTION:
      ;example.com. IN A

      ;; ANSWER SECTION:
      example.com. 268 IN A 104.18.27.120
      example.com. 268 IN A 104.18.26.120

      ;; Query time: 9 msec
      ;; SERVER: 127.0.0.53#53(127.0.0.53)
      ;; WHEN: Wed Dec 24 12:49:43 IST 2025
      ;; MSG SIZE rcvd: 72

      $ resolvectl query example.com
      example.com: 2606:4700::6812:1b78
      2606:4700::6812:1a78
      104.18.27.120
      104.18.26.120

      -- Information acquired via protocol DNS in 88.0ms.
      -- Data is authenticated: no; Data was acquired via local or encrypted transport: no
      -- Data from: network

      Because editing the file directly no longer works reliably, we must use tools that communicate with the systemd-resolved daemon.

      Suppose you want to force your primary ethernet interface (eth0) to bypass DHCP DNS and use Google’s servers temporarily:

      sudo systemd-resolve --set-dns=8.8.8.8 --set-dns=8.8.4.4 --interface=eth0

      To check what is actually happening—seeing which DNS servers are bound to which interface scopes—run:

      systemd-resolve --status

      and to clear the manual overrides and go back to whatever setting DHCP provided:

      sudo systemd-resolve --revert --interface=eth0

      We’ve come a long way from System V R3. While the simplicity of the classical text-file approach is nostalgic for those of us who grew up on it, the dynamic nature of today’s networking requires a smarter local resolver daemon. It adds complexity, but it’s the price we pay for seamless connectivity in a mobile world.

    2. When Pi-hole + Unbound Stop Resolving: A DNSSEC Trust Anchor Fix

      I have my own private DNS setup in my home network, powered by Pi-hole running on my very first Raspberry Pi, a humble Model B Rev 2. It’s been quietly handling ad-blocking and DNS resolution for years. But today, something broke.

      I noticed that none of my devices could resolve domain names. Pi-hole’s dashboard looked fine. The DNS service was running, blocking was active, but every query failed. Even direct dig queries returned SERVFAIL. Here’s how I diagnosed and resolved the issue.

      The Setup

      My Pi-hole forwards DNS queries to Unbound, a recursive DNS resolver running locally on port 5335. This is configured in /etc/pihole/setupVars.conf.

      PIHOLE_DNS_1=127.0.0.1#5335
      PIHOLE_DNS_2=127.0.0.1#5335

      And my system’s /etc/resolv.conf points to Pi-hole itself

      nameserver 127.0.0.1

      Unbound is installed with the dns-root-data package, which provides root hints and DNSSEC trust anchors:

      $ dpkg -l dns-root-data|grep ^ii
      ii dns-root-data 2024041801~deb11u1 all DNS root hints and DNSSEC trust anchor

      The Symptoms

      Despite everything appearing normal, DNS resolution failed:

      $ dig google.com @127.0.0.1 -p 5335

      ;; ->>HEADER<<- opcode: QUERY, status: SERVFAIL

      Even root-level queries failed:

      $ dig . @127.0.0.1 -p 5335

      ;; ->>HEADER<<- opcode: QUERY, status: SERVFAIL

      Unbound was running and listening:

      $ netstat -tulpn | grep 5335

      tcp 0 0 127.0.0.1:5335 0.0.0.0:* LISTEN 29155/unbound

      And outbound connectivity was fine. I pinged one of the root DNS servers directly to ensure this:

      $ ping -c1 198.41.0.4 
      PING 198.41.0.4 (198.41.0.4) 56(84) bytes of data.
      64 bytes from 198.41.0.4: icmp_seq=1 ttl=51 time=206 ms

      --- 198.41.0.4 ping statistics ---
      1 packets transmitted, 1 received, 0% packet loss, time 0ms
      rtt min/avg/max/mdev = 205.615/205.615/205.615/0.000 ms

      The Diagnosis

      At this point, I suspected a DNSSEC validation failure. Unbound uses a trust anchor, which is simply a cryptographic key stored in root.key. This cryptographic key is used to verify the authenticity of DNS responses. Think of it like a passport authority: when you travel internationally, border agents trust your passport because it was issued by a recognized authority. Similarly, DNSSEC relies on a trusted key at the root of the DNS hierarchy to validate every response down the chain. If that key is missing, expired, or corrupted, Unbound can’t verify the authenticity of DNS data — and like a border agent rejecting an unverified passport, it simply refuses to answer, returning SERVFAIL.

      Even though dns-root-data was installed, the trust anchor wasn’t working.

      The Fix

      I regenerated the trust anchor manually:

      $ sudo rm /usr/share/dns/root.key
      $ sudo unbound-anchor -a /usr/share/dns/root.key
      $ sudo systemctl restart unbound

      After this, Unbound started resolving again:

      $ dig google.com @127.0.0.1 -p 5335

      ;; ->>HEADER<<- opcode: QUERY, status: NOERROR
      ;; ANSWER SECTION:
      google.com. 300 IN A 142.250.195.78

      Why This Happens

      Even with dns-root-data, the trust anchor could become stale — especially if the system missed a rollover event or the file was never initialized. Unbound doesn’t log this clearly, so it’s easy to miss.

      Preventing Future Failures

      To avoid this in the future, I added a weekly cron job to refresh the trust anchor:

      0 3 * * 0 /usr/sbin/unbound-anchor -a /usr/share/dns/root.key

      And a watchdog script to monitor Unbound health:

      $ dig . @127.0.0.1 -p 5335 | grep -q 'status: NOERROR' || systemctl restart unbound

      This was a good reminder that even quiet systems need occasional maintenance. Pi-hole and Unbound are powerful together, but DNSSEC adds complexity. If you’re running a similar setup, keep an eye on your trust anchors, and don’t trust the dashboard alone.