Ajitabh Pandey's Soul & Syntax

Exploring systems, souls, and stories – one post at a time

Tag: RaspberryPi

  • Raspberry Pi Wireless Device Power Off

    I use my device as headless as a home server and as a jump box. From past quite some time I was noticing that my Raspberry Pi was not accessible over the network after some period of in-activity. And since it is headless, the only way to get the network back was either take out the USB Wireless adapter or Reboot the Pi (through the power switch). I chose to take out the adapter and reseat it. However, this was causing my RPi to reboot also, may be because in the process the power connector was getting disturbed. I will revisit this point later.

    In order to switch off the power saving for my wireless device I tried

    $ sudo iwconfig wlan0 power off
    Error for wireless request "Set Power Management" (8B2C) :
        SET failed on device wlan0 ; Operation not permitted.

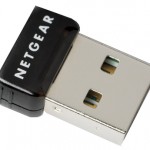
    I am using NetGear USB wireless adapter and it load the kernel module 8192cu. Checking

    $ cat /sys/module/8192cu/parameters/rtw_power_mgnt 
    1

    I realized that the power saving is still on (1 indicates minimum power saving). So I created a module config file as below to permanently set the power saving to 0 and rebooted the RPi.

    $ sudo vi /etc/modprobe.d/8192cu.conf 
    # Disable the power management during boot - Ajitabh
    options 8192cu rtw_power_mgnt=0
    $ sudo reboot

    Checking again confirmed that the power management has been disabled.

    $ cat /sys/module/8192cu/parameters/rtw_power_mgnt 
    0
  • RPi – Static IP Address on Wifi

    There is a GUI tool in the desktop called “wpa_gui” which can be used to connect to the wireless network provided you have a supported wireless card attached to the RPi. However, if I want to run a headless RPi I would need a static IP address. Unfortunately “wpa_gui” does not provide me a means of configuring static IP address on the “wan0″ interface and my ADSL router does not support associating a static IP address with a MAC Address. This means I have to use static IP address configured on my wireless interface on the RPi and have to do it the old fashioned way (read I am loving it).

    Open up the “/etc/network/interfaces” file and make the following entries. The commented lines are the one’s which were added by the “wpa_gui” and we don’t need them. If you have little Debian experience, you will find these lines self explanatory:

    auto lo
    iface lo inet loopback
    
    #auto eth0
    iface eth0 inet static
    address eth0 192.168.1.52
    netmask 255.255.255.0
    gateway 192.168.1.1
    
    auto wlan0
    allow-hotplug wlan0
    iface wlan0 inet static
    address 192.168.1.51
    netmask 255.255.255.0
    gateway 192.168.1.1
    wpa-ssid "My SSID"
    wpa-passphrase "My Passphrase"

    I have added a static IP address configuration line for the eth0 interface also, so that in case someday I connect my RPi to physical connection I will just bring my eth0 interface up and have an IP address. The reason I have commented the “auto eth0” line is because in case a physical interface is up, the default route of the system is always through the physical interface i.e eth0 in this case. So, if my WiFi is up, I want my packets to go in/out through WiFi by default and not through “eth0” (by the way it does not matter if you have connected the cable physically or not, if the physical interface is up, it is the default route out). Of-course we can prevent that, but it is going to be a little bit complicated, so we are going to just comment out auto line to make sure that the “eth0” does not come up. It is also possible to have both “eth0” and “wlan0” run simultaneously, but again it is a bit complicated for this post and I do not need that anyway.

    Now you can restart the networking or reboot the RPi and your WiFi should come up with the static IP address.

  • Raspberry Pi And Me

    I bought a Raspberry Pi somewhere in March this year. After a very hectic schedule, I managed to find few hours yesterday evening to explore it. I bought the following accessories in order to use it –

    • A Belkin 4-port powered USB Hub
    • Netgear Wireless USB Micro Adapter
    • Dell LCD Monitor (wall mounted). This was a cheap VGA based
    • HDMI to VGA converter. Raspberry Pi has HDMI port, so I needed a converted to attach it to my monitor.
    • A USB A to USB Micro cable to power the Raspberry Pi
    • iBall Wireless USB Keyboard and Mouse
    • 32 GB MicroSD card with a Micro SD to SD card adapter

    The LCD and USB hub occupies the power sockets. The Raspberry Pi is powered from the USB hub using a USB A to USB micro cable. The two USB ports on the Raspberry Pi have been occupied with the USB Hub and iBall wireless adapter for Keyboard and Mouse. The Netgear wireless adapter has been connected to the USB Hub and so is my external HDD for extra storage.

    I am using Raspbian (a variant of Debian meant for Raspberry Pi), distributed by the the Raspberry Pi Foundation, which is a little different from the images by Raspbian project.

    I had (and still have) some problems with booting while my monitor is connected, perhaps because the HDMI to VGA converter is drawing too much power from the RPi. I need to look into it later.

    The initial idea of using it as a light weight desktop environment is not going to work because of lack of flash support, and speed related issues. Although HTML 5 videos can be played, they need a separate configuration for the installed browser Midori. More on that configuration later.

    In general it is a bit slower because all the applications are not designed to use the GPU effectively and the processor is too slow by even the standards of a high end mobile phone. Although I am typing this blog post on RPi using Midori web browser, I can feel the slowness while trying to add pictures as an attachment which needs JavaScripts to be processed at client side. I tried opening up the Yahoo Mail earlier today, it worked but it was very slow, almost unusable.

    However, I have observed that it is ok for teaching programming to kids and also I can perhaps run it as a headless media player using XBMC and so on. For now I have installed Perl, Python and FreeBasic programming environments on this. All of which should work through command line effectively.

    I will make further posts sharing my experience on this credit card size device.

    Stay tuned.