Ajitabh Pandey's Soul & Syntax

Exploring systems, souls, and stories – one post at a time

Tag: Oracle

  • Get Oracle XE-ORDS-APEX Up and Running Quickly with Ansible

    Oracle APEX is a rapid application development tool and from what I have seen its quite powerful. Clubed together with ORDS, it is a powerful tool to develop enterprise applications which are highly scalable, provided you are willing to spend $$$$ as everything depends on underlying Oracle Database.

    For those who want to learn the tool, Oracle XE (Express Edition) can be used as a development environment. Setting up the full stack can be a little bit challenging for developers who wants to stick to building their core strength and not mess with infrastructure deployments etc.

    To help here, I wrote this ansible playbook, which will quickly setup the entire stack. Accompanied in the git repository are the Vagrantfile which can quickly setup the DEV environment in a VirtualBox VM. The stack is currently based on CentOS 7.x (and can run in RHEL 7.x as well).

    The README file in the git repostory is self explanatory and explains in detail on how to use this playbook to get the stack up and running.

    Upcoming Enhancements

    I will be making suitable modifications in to make it run on RHEL 8.x and Oracle Linux 8.x. I will also be working on fixing the accompanied packer file which has not been tested thoroughly for building a Docker Image. I plan to get a packer file in place to build a VirtualBox box file, a Digital Ocean droplet image, and a Docker build.

    Keep watching the GitHub repository for the changes and do report any issues or feature enhancements. Feel free to submit PRs in case you get to the planned enhancements before me.

  • Running Oracle 11g Release 2 (11.2.0.2) XE in Docker Container

    In DockerCon2017 Oracle announced the availability of Oracle containers in the docker hub. This was a great step forward. I have been thinking of trying Oracle in docker from quite a while for some personal projects, but was not finding time to experiment. The availability of docker build files on github made this task easier. You would still need to download the Oracle Database files from OTN and place them in the prespecified directory.

    I tried 11g R2 XE and it was successful. The instructions provided are quite decent so I am not going to explain everything here again.

    I am running Docker 17.04.0-ce on OpenSuSe Leap 42.2. While building both 12c and 11gR2 containers I was getting “HEALTHCHECK Unknown flag error”. This is becauseĀ  HEALTHCHECK option was made available in Docker 17.06 onwards. As suggested in this issue, I simply removed the following line from the Dockerfile.xe and then the image built flawlessly.

    HEALTHCHECK --interval=1m --start-period=5m \
    CMD [ "su", "-p", "oracle", "-c", "$ORACLE_BASE/$CHECK_DB_FILE > /dev/null || exit 1" ]

    Following is the quick sequence of steps I followed to build the image and to test the connectivity using sqlplus from the container itself.

    user01@mylaptop > ./buildDockerImage.sh -v 11.2.0.2 -x
    user01@mylaptop > docker run --name oracle --shm-size=1g -p 1521:1521 -p 8080:8080 -e ORACLE_PWD=Passw0rd123 -v /home/user01/Documents/oradata:/u01/app/oracle/oradata oracle/database:11.2.0.2-xe
    user01@mylaptop > docker stop oracle
    user01@mylaptop > docker start oracle
    user01@mylaptop > docker exec -it --user oracle oracle bash
    bash-4.2$ sqlplus / as sysdba
    
    SQL*Plus: Release 11.2.0.2.0 Production on Fri Feb 9 01:02:42 2018
    
    Copyright (c) 1982, 2011, Oracle.  All rights reserved.
    
    
    Connected to:
    Oracle Database 11g Express Edition Release 11.2.0.2.0 - 64bit Production
    
    SQL> select sysdate from dual;
    
    SYSDATE
    ---------
    09-FEB-18
    
    SQL>

    Next I am planning to get a container running tomcat with ORDS on it. Stay tuned.

  • Connecting to Oracle Database over SSH using SQLDeveloper 4.1

    As a system administrator, I try to follow the principle of least privilege (minimal privilege). Therefore, in the systems I install, I block all incoming and outgoing ports by default and open only when needed.

    While setting up Oracle XE on some machines, port 1521 usually needs to be open so that engineers can connect to the database on that port and perform their developmental work. If this port is blocked and only SSH port is opened in the local firewall, then SQL Developer 4.1 provides a facility to create SSH tunnel and allows connections over that secure tunnel.

    Get Started

    • Launching SQL Developer 4.1, click onĀ  the View > SSH menu to open up the SSH Connections panel.
    • In the SSH panel, right-click on the SSH Hosts and choose New SSH Host
    • Complete the SSH connections dialog –
      • Name – This is the connection name and can be anything which identifies the connection.
      • Host – This is the host name or IP address of the host where we are trying to establish the SSH connectivity.
      • Port – This is the port on which your SSH daemon listens to. By default the port is 22, but if your SysAdmin has changed this to something else, please put that value here.
      • If you use a SSH Key File to connect to the server, select the check box “Use key file” and then Browse and select the private key file which needs to be used to establish connection. In case you use password, the you can ignore this check box and during connection, you will be prompted for your password.
      • In order to tunnel the Oracle connections inside an SSH tunnel, you need to select the check box “Add a Local Port Forward”. I normally leave the values in the Name, Host and Port fields to default, but you can change them. If you change these values from Default, localhost and 1521 respectively, then please note it down as you will need to specify this host name and port number in the Oracle Database connections dialog box.


    • You can now right click on the SSH Host which you created and click on “Test” to test the connection.
    • After you see the success message, create a new connection for your Oracle database by providing your connection details as usual.
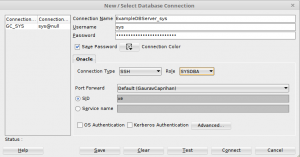
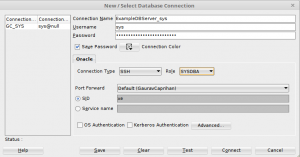
      • If you select the “Connection Type” as “Basic” from the drop-down, the only change would be you host name and port number in case you changed those while creating the SSH connection.
      • If you select the “Connection Type” as “SSH” from the drop down, you just select the Connection name which you created from the “Port Forward” drop down.

    I hope this helps.

  • Installing Oracle Instant Client for Mac OSX

    I came across few links for installing Oracle Instant Client on Mac OS X namely – this and this. But I don’t like to tinker with the System paths while installing any s/w manually. I did the same with perl CPAN modules, I install them locally in home directory and same with Python pip packages, but that’s another post for future. So I had to work out the following method for installing the Oracle Instant Client as I needed sqlplus client for connecting to my RDS Oracle instance.

    Download the following two files from http://www.oracle.com/technetwork/topics/intel-macsoft-096467.html

    instantclient-basic-macos.x64-11.2.0.4.0.zip
    instantclient-sqlplus-macos.x64-11.2.0.4.0.zip

    These will be downloaded in the Downloads directory

    Unzip these two files in a single directory

    $ cd Downloads
    $ unzip instantclient-sqlplus-macos.x64-11.2.0.4.0.zip
    $ unzip instantclient-basic-macos.x64-11.2.0.4.0.zip
    $ cd ~

    Create the required structure in the home directory and copy the files in place

    $ mkdir -p oracle/product/instantclient_64/11.2.0.4.0/{bin,lib,jdbc/lib,rdbms/jlib,sqlplus/admin,network/admin}
    $ mv Downloads/instantclient_11_2/ojdbc* product/instantclient_64/11.2.0.4.0/jdbc/lib/
    $ mv Downloads/instantclient_11_2/x*.jar product/instantclient_64/11.2.0.4.0/rdbms/jlib/
    $ mv Downloads/instantclient_11_2/glogin.sql product/instantclient_64/11.2.0.4.0/sqlplus/admin/
    $ mv Downloads/instantclient_11_2/*dylib* product/instantclient_64/11.2.0.4.0/lib/
    $ mv Downloads/instantclient_11_2/*README product/instantclient_64/11.2.0.4.0/
    $ mv Downloads/instantclient_11_2/adrci instantclient_11_2/genezi instantclient_11_2/sqlplus instantclient_11_2/uidrvci product/instantclient_64/11.2.0.4.0/bin/

    Make the following additions to your ~/.bashrc file –

    ORACLE_HOME="~/oracle/product/instantclient_64/11.2.0.4.0"
    PATH=$ORACLE_HOME/bin:$PATH
    alias sqlplus="DYLD_LIBRARY_PATH=$ORACLE_HOME/lib sqlplus"

    Now I can connect to the Oracle RDS instance using –

    $ sqlplus 'root@(DESCRIPTION=(ADDRESS=(PROTOCOL=TCP)(HOST=ajitabh-oracle-test.bkl9a9lqwsoxcd.us-west-1.rds.amazonaws.com)(PORT=1521))(CONNECT_DATA=(SID=ORCL)))'
    
    SQL*Plus: Release 11.2.0.4.0 Production on Wed Aug 26 21:59:46 2015
    
    Copyright (c) 1982, 2013, Oracle. All rights reserved.
    
    Enter password:
    
    Connected to:
    Oracle Database 11g Release 11.2.0.4.0 - 64bit Production
    
    SQL>

    That’s it. More on exploring Oracle RDS later.