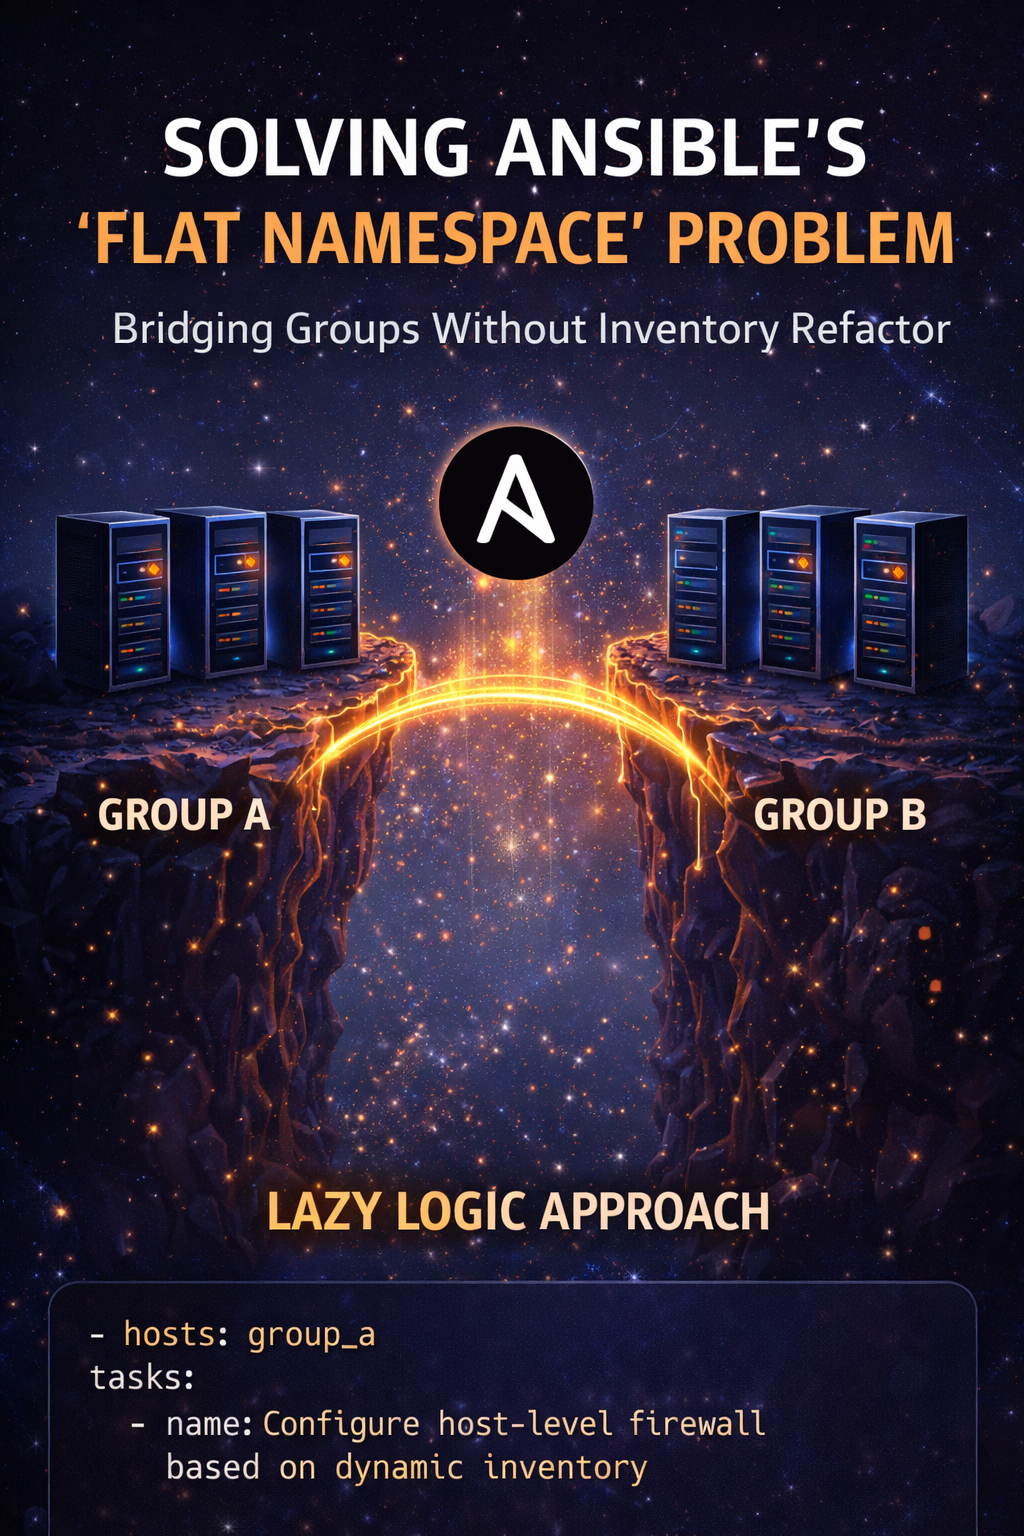
In Ansible, the “Flat Namespace” problem is a frequent stumbling block for engineers managing multi-tier environments. It occurs because Ansible merges variables from various sources (global, group, and host) into a single pool for the current execution context.
If you aren’t careful, trying to use a variable meant for “Group A” while executing tasks on “Group B” will cause the play to crash because that variable simply doesn’t exist in Group B’s scope.
The Scenario: The “Mixed Fleet” Crash
Imagine you are managing a fleet of Web Servers (running on port 8080) and Database Servers (running on port 5432). You want a single “Security” play to validate that the application port is open in the firewall.
The Failing Code:
- name: Apply Security Rules
  hosts: web:database
  vars:
    # This is the "Flat Namespace" trap!
    # Ansible tries to resolve BOTH variables for every host.
    app_port_map:
      web_servers: "{{ web_custom_port }}"
      db_servers: "{{ db_instance_port }}"

  tasks:
    - name: Validate port is defined
      ansible.builtin.assert:
        that: app_port_map[group_names[0]] is defined
This code fails when Ansible runs this for a web_server, it looks at app_port_map. To build that dictionary, it must resolve db_instance_port. But since the host is a web server, the database group variables aren’t loaded. Result: fatal: 'db_instance_port' is undefined.
Solution 1: The “Lazy” Logic
By using Jinja2 whitespace control and conditional logic, we prevent Ansible from ever looking at the missing variable. It only evaluates the branch that matches the host’s group.
- name: Apply Security Rules
  hosts: app_servers:storage_servers
  vars:
    # Use whitespace-controlled Jinja to isolate variable calls
    target_port: >-
      {%- if 'app_servers' in group_names -%}
        {{ app_service_port }}
      {%- elif 'storage_servers' in group_names -%}
        {{ storage_backend_port }}
      {%- else -%}
        22
      {%- endif -%}

  tasks:
    - name: Ensure port is allowed in firewall
      community.general.ufw:
        rule: allow
        port: "{{ target_port | int }}"
The advantage of this approach is that it’s very explicit, prevents “Undefined Variable” errors entirely, and allows for easy defaults. However, it can become verbose/messy if you have a large number of different groups.
Solution 2: The hostvars Lookup
If you don’t want a giant if/else block, you can use hostvars to dynamically grab a value, but you must provide a default to keep the namespace “safe.”
This approach is very compact and follows a naming convention (e.g., groupname_port). But its harder to debug and relies on strict variable naming across your entire inventory.
Solution 3: Group Variable Normalization
The most “architecturally sound” way to solve the flat namespace problem is to use the same variable name across different group_vars files.
# Playbook - main.yml
---
- name: Unified Firewall Play
  hosts: all
  tasks:
    - name: Open service port
      community.general.ufw:
        port: "{{ service_port }}" # No logic needed!
        rule: allow
This is the cleanest playbook code; truly “Ansible-native” way of handling polymorphism but it requires refactoring your existing variable names and can be confusing if you need to see both ports at once (e.g., in a Load Balancer config).
The “Flat Namespace” problem is really just a symptom of Ansible’s strength: it’s trying to make sure everything you’ve defined is valid. I recently solved this problem in a multi-play playbook, which I wrote for Digital Ocean infrastructure provisioning and configuration using the Lazy Logic approach, and I found this to be the best way to bridge the gap between “Group A” and “Group B” without forcing a massive inventory refactor. While I have generalized the example code, I actually faced this problem in a play that set up the host-level firewall based on dynamic inventory.
We’ve journeyed through the foundational principles of automated recovery, celebrated the lightning-fast resilience of stateless champions, and navigated the treacherous waters of stateful data dilemmas. Now, it’s time to pull back the curtain on the silent sentinels, the tools, tactics, and operational practices that knit all these recovery mechanisms together. These are the unsung heroes behind the “unseen heroes” if you will, constantly working behind the scenes to ensure your digital world remains upright.
Think of it like building a super-secure, self-repairing fortress. You’ve got your strong walls and self-cleaning rooms, but you also need surveillance cameras, automated construction robots, emergency repair kits, and smart defense systems. That’s what these cross-cutting components are to automated recovery.
The All-Seeing Eyes: Monitoring and Alerting
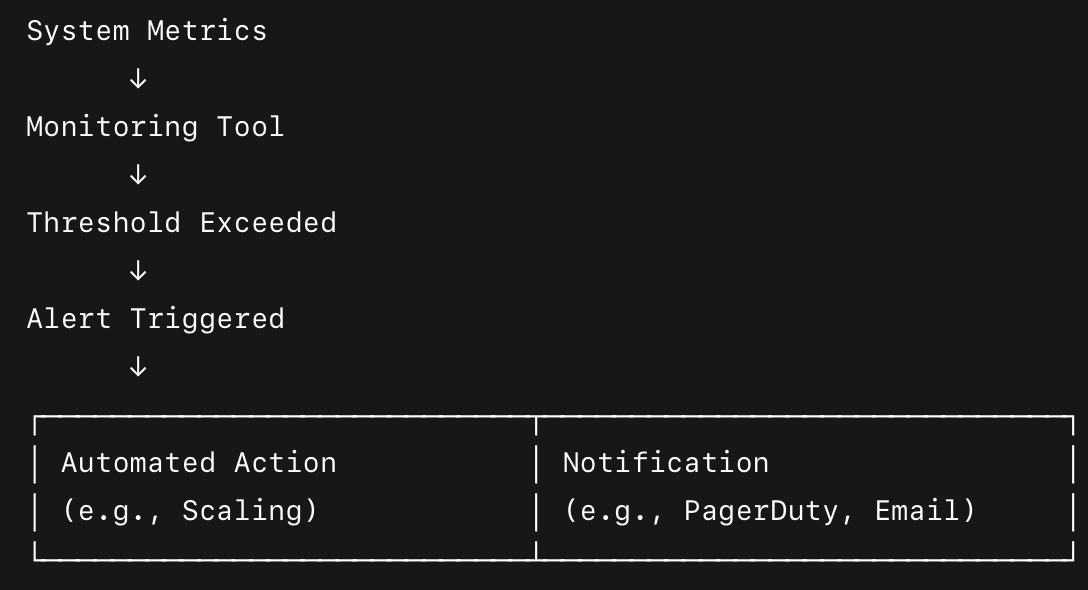
You can’t fix what you don’t know is broken, right? Monitoring is literally the eyes and ears of your automated recovery system. It’s about continuously collecting data on your system’s health, performance, and resource utilization. Are your servers feeling sluggish? Is a database getting overwhelmed? Are error rates suddenly spiking? Monitoring tools are constantly watching, watching, watching.
But just watching isn’t enough. When something goes wrong, you need to know immediately. That’s where alerting comes in. It’s the alarm bell that rings when a critical threshold is crossed (e.g., CPU usage hits 90% for five minutes, or error rates jump by 50%). Alerts trigger automated responses, notify engineers, or both.
For example, imagine an online retail platform. Monitoring detects that latency for checkout requests has suddenly quadrupled. An alert immediately fires, triggering an automated scaling script that brings up more checkout servers, and simultaneously pings the on-call team. This happens before customers even notice a significant slowdown.
The following flowchart visually convey the constant vigilance of monitoring and the immediate impact of alerting in automated recovery.
Building by Blueprint: Infrastructure as Code (IaC)
Back in the days we used to set up server and configure networks manually. I still remember installing SCO Unix, Windows 95/98/NT/2000, RedHat/Slackware Linux manually using 5.25 inch DSDD or 3.5 inch floppy drives, which were later replaced by CDs as an installation medium. It was slow, error-prone, and definitely not “automated recovery” friendly. Enter Infrastructure as Code (IaC). This is the practice of managing and provisioning your infrastructure (servers, databases, networks, load balancers, etc.) using code and version control, just like you manage application code.
If a data center goes down, or you need to spin up hundreds of new servers for recovery, you don’t do it by hand. You simply run an IaC script (using tools like Terraform, CloudFormation, Ansible, Puppet). This script automatically provisions the exact infrastructure you need, configured precisely as it should be, every single time. It’s repeatable, consistent, and fast.
Lets look at an example when a major cloud region experiences an outage affecting multiple servers for a SaaS application. Instead of manually rebuilding, the operations team triggers a pre-defined Terraform script. Within minutes, new virtual machines, network configurations, and load balancers are spun up in a different, healthy region, exactly replicating the desired state.
Ship It & Fix It Fast: CI/CD Pipelines for Recovery
Continuous Integration/Continuous Delivery (CI/CD) pipelines aren’t just for deploying new features; they’re vital for automated recovery too. A robust CI/CD pipeline ensures that code changes (including bug fixes, security patches, or even recovery scripts) are automatically tested and deployed quickly and reliably.
In the context of recovery, CI/CD pipelines offer several key advantages. They enable rapid rollbacks, allowing teams to quickly revert to a stable version if a new deployment introduces issues. They also facilitate fast fix deployment, where critical bugs discovered during an outage can be swiftly developed, tested, and deployed with minimal manual intervention, effectively reducing downtime. Moreover, advanced deployment strategies such as canary releases or blue-green deployments, which are often integrated within CI/CD pipelines, make it possible to roll out new versions incrementally or in parallel with existing ones. These strategies help in quickly isolating and resolving issues while minimizing the potential impact of failures.
For example, if a software bug starts causing crashes on production servers. The engineering team pushes a fix to their CI/CD pipeline. The pipeline automatically runs tests, builds new container images, and then deploys them using a blue/green strategy, gradually shifting traffic to the fixed version. If any issues are detected during the shift, it can instantly revert to the old, stable version, minimizing customer impact.
The Digital Safety Net: Backup and Restore Strategies
Even with all the fancy redundancy and replication, sometimes you just need to hit the “undo” button on a larger scale. That’s where robust backup and restore strategies come in. This involves regularly copying your data (and sometimes your entire system state) to a separate, secure location, so you can restore it if something truly catastrophic happens (like accidental data deletion, ransomware attack, or a regional disaster).
If a massive accidental deletion occurs on a production database, the automated backups, taken hourly and stored in a separate cloud region, allow the database to be restored to a point just before the deletion occurred, minimizing data loss and recovery time.
The Smart Defenders: Resilience Patterns
Building robustness directly into an application’s code and architecture often involves adopting specific design patterns that anticipate failure and respond gracefully. Circuit breakers, for example, act much like their electrical counterparts by “tripping” when a service begins to fail, temporarily blocking requests to prevent overload or cascading failures. Once the set cooldown time has passed, they “reset” to test if the service has recovered. This mechanism prevents retry storms that could otherwise overwhelm a recovering service.
For instance, in an e-commerce application, if a third-party payment gateway starts returning errors, a circuit breaker can halt further requests and redirect users to alternative payment methods or display a “try again later” message, ensuring that the failing gateway isn’t continuously hammered.
The following is an example of circuit breaker implementation using Istio. The outlierDetection implements automatic ejection of unhealthy hosts when failures exceed thresholds. This effectively acts as a circuit breaker, stopping traffic to failing instances.
apiVersion: networking.istio.io/v1alpha3
kind: DestinationRule
metadata:
  name: reviews-cb
  namespace: default
spec:
  host: reviews.default.svc.cluster.local
  trafficPolicy:
    connectionPool:
      tcp:
        maxConnections: 100              # Maximum concurrent TCP connections
      http:
        http1MaxPendingRequests: 50      # Max pending HTTP requests
        maxRequestsPerConnection: 10     # Max requests per connection (keep-alive limit)
        maxRetries: 3                    # Max retry attempts per connection
    outlierDetection:
      consecutive5xxErrors: 5            # Trip circuit after 5 consecutive 5xx responses
      interval: 10s                      # Check interval for ejection
      baseEjectionTime: 30s              # How long to eject a host
      maxEjectionPercent: 50             # Max % of hosts to eject
Bulkhead is another powerful resilience strategy, which draw inspiration from ship compartments. Bulkheads isolate failures within a single component so they do not bring down the entire system. This is achieved by allocating dedicated resources—such as thread pools or container clusters—to each microservice or critical subsystem.
In the above Istio configration there is another line in the config – connectionPool, which controls the maximum number of concurrent connections and queued requests. This is equivalent to the “bulkhead” concept, preventing one service from exhausting all resources.
In practice, if your backend architecture separates user profiles, order processing, and product search into different microservices, a crash in the product search component won’t affect the availability of user profiles or order processing services, allowing the rest of the system to function normally.
Additional patterns like rate limiting and retries with exponential backoff further enhance system resilience.
Rate limiting controls the volume of incoming requests, protecting services from being overwhelmed by sudden spikes in traffic, whether malicious or legitimate. The following code is a sample rate limiting snipped from nginx (leaky bucket via limit_req):
http { # shared zone 'api' with 10MB of state, 5 req/sec limit_req_zone $binary_remote_addr zone=api:10m rate=5r/s;
Exponential backoff ensures that failed requests are retried gradually—waiting 1 second, then 2, then 4, and so forth—giving struggling services time to recover without being bombarded by immediate retries.
For example, if an application attempts to connect to a temporarily unavailable database, exponential backoff provides breathing room for the database to restart and stabilize. Together, these cross-cutting patterns form the foundational operational pillars of automated system recovery, creating a self-healing ecosystem where resilience is woven into every layer of the infrastructure.
Consider the following code snippet where retries with exponential backoff is implemented. I have not tested this code and this is just a quick implementation to explain the concept –
for attempt in range(1, max_attempts + 1): try: return fn() except RetryableError as e: # define/classify your retryable errors last_exc = e if attempt == max_attempts: break # full jitter sleep_for = random.uniform(0, min(delay, max_delay)) time.sleep(sleep_for) delay = min(delay * factor, max_delay)
raise last_exc
In our next and final blog post, we’ll shift our focus to the bigger picture: different disaster recovery patterns and the crucial human element, how teams adopt, test, and foster a culture of resilience. Get ready for the grand finale!