Ajitabh Pandey's Soul & Syntax

Exploring systems, souls, and stories – one post at a time

Category: FLOSS

About Free/Libre/Open Source Software

  • When Pi-hole + Unbound Stop Resolving: A DNSSEC Trust Anchor Fix

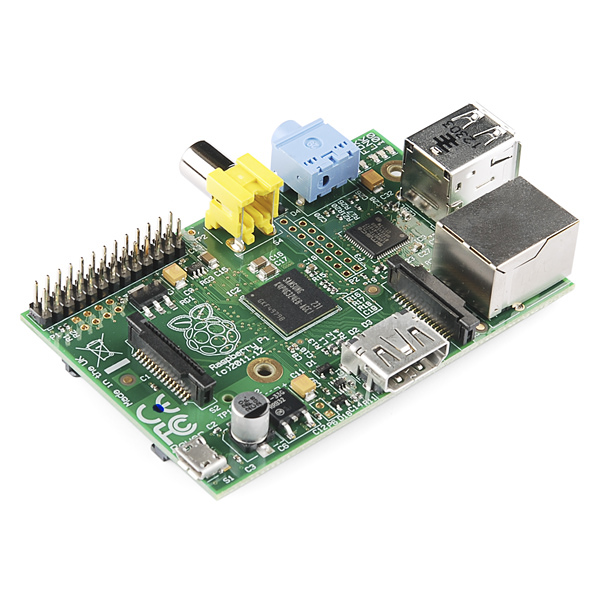
    I have my own private DNS setup in my home network, powered by Pi-hole running on my very first Raspberry Pi, a humble Model B Rev 2. It’s been quietly handling ad-blocking and DNS resolution for years. But today, something broke.

    I noticed that none of my devices could resolve domain names. Pi-hole’s dashboard looked fine. The DNS service was running, blocking was active, but every query failed. Even direct dig queries returned SERVFAIL. Here’s how I diagnosed and resolved the issue.

    The Setup
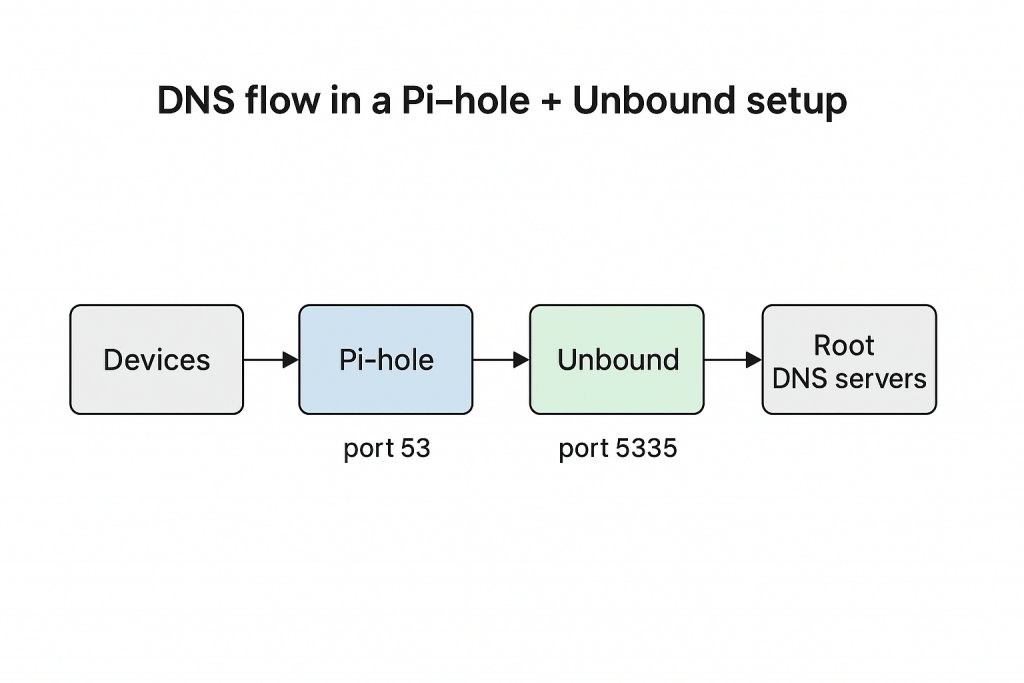
    My Pi-hole forwards DNS queries to Unbound, a recursive DNS resolver running locally on port 5335. This is configured in /etc/pihole/setupVars.conf.

    PIHOLE_DNS_1=127.0.0.1#5335
    PIHOLE_DNS_2=127.0.0.1#5335

    And my system’s /etc/resolv.conf points to Pi-hole itself

    nameserver 127.0.0.1

    Unbound is installed with the dns-root-data package, which provides root hints and DNSSEC trust anchors:

    $ dpkg -l dns-root-data|grep ^ii
    ii dns-root-data 2024041801~deb11u1 all DNS root hints and DNSSEC trust anchor

    The Symptoms

    Despite everything appearing normal, DNS resolution failed:

    $ dig google.com @127.0.0.1 -p 5335

    ;; ->>HEADER<<- opcode: QUERY, status: SERVFAIL

    Even root-level queries failed:

    $ dig . @127.0.0.1 -p 5335

    ;; ->>HEADER<<- opcode: QUERY, status: SERVFAIL

    Unbound was running and listening:

    $ netstat -tulpn | grep 5335

    tcp 0 0 127.0.0.1:5335 0.0.0.0:* LISTEN 29155/unbound

    And outbound connectivity was fine. I pinged one of the root DNS servers directly to ensure this:

    $ ping -c1 198.41.0.4 
    PING 198.41.0.4 (198.41.0.4) 56(84) bytes of data.
    64 bytes from 198.41.0.4: icmp_seq=1 ttl=51 time=206 ms

    --- 198.41.0.4 ping statistics ---
    1 packets transmitted, 1 received, 0% packet loss, time 0ms
    rtt min/avg/max/mdev = 205.615/205.615/205.615/0.000 ms

    The Diagnosis

    At this point, I suspected a DNSSEC validation failure. Unbound uses a trust anchor, which is simply a cryptographic key stored in root.key. This cryptographic key is used to verify the authenticity of DNS responses. Think of it like a passport authority: when you travel internationally, border agents trust your passport because it was issued by a recognized authority. Similarly, DNSSEC relies on a trusted key at the root of the DNS hierarchy to validate every response down the chain. If that key is missing, expired, or corrupted, Unbound can’t verify the authenticity of DNS data — and like a border agent rejecting an unverified passport, it simply refuses to answer, returning SERVFAIL.

    Even though dns-root-data was installed, the trust anchor wasn’t working.

    The Fix

    I regenerated the trust anchor manually:

    $ sudo rm /usr/share/dns/root.key
    $ sudo unbound-anchor -a /usr/share/dns/root.key
    $ sudo systemctl restart unbound

    After this, Unbound started resolving again:

    $ dig google.com @127.0.0.1 -p 5335

    ;; ->>HEADER<<- opcode: QUERY, status: NOERROR
    ;; ANSWER SECTION:
    google.com. 300 IN A 142.250.195.78

    Why This Happens

    Even with dns-root-data, the trust anchor could become stale — especially if the system missed a rollover event or the file was never initialized. Unbound doesn’t log this clearly, so it’s easy to miss.

    Preventing Future Failures

    To avoid this in the future, I added a weekly cron job to refresh the trust anchor:

    0 3 * * 0 /usr/sbin/unbound-anchor -a /usr/share/dns/root.key

    And a watchdog script to monitor Unbound health:

    $ dig . @127.0.0.1 -p 5335 | grep -q 'status: NOERROR' || systemctl restart unbound

    This was a good reminder that even quiet systems need occasional maintenance. Pi-hole and Unbound are powerful together, but DNSSEC adds complexity. If you’re running a similar setup, keep an eye on your trust anchors, and don’t trust the dashboard alone.

  • Why Systemd Timers Outshine Cron Jobs

    For decades, cron has been the trusty workhorse for scheduling tasks on Linux systems. Need to run a backup script daily? cron was your go-to. But as modern systems evolve and demand more robust, flexible, and integrated solutions, systemd timers have emerged as a superior alternative. Let’s roll up our sleeves and dive into the strategic advantages of systemd timers, then walk through their design and implementation..

    Why Ditch Cron? The Strategic Imperative

    While cron is simple and widely understood, it comes with several inherent limitations that can become problematic in complex or production environments:

    • Limited Visibility and Logging: cron offers basic logging (often just mail notifications) and lacks a centralized way to check job status or output. Debugging failures can be a nightmare.
    • No Dependency Management: cron jobs are isolated. There’s no built-in way to ensure one task runs only after another has successfully completed, leading to potential race conditions or incomplete operations.
    • Missed Executions on Downtime: If a system is off during a scheduled cron run, that execution is simply missed. This is critical for tasks like backups or data synchronization.
    • Environment Inconsistencies: cron jobs run in a minimal environment, often leading to issues with PATH variables or other environmental dependencies that work fine when run manually.
    • No Event-Based Triggering: cron is purely time-based. It cannot react to system events like network availability, disk mounts, or the completion of other services.
    • Concurrency Issues: cron doesn’t inherently prevent multiple instances of the same job from running concurrently, which can lead to resource contention or data corruption.

    systemd timers, on the other hand, address these limitations by leveraging the full power of the systemd init system. (We’ll dive deeper into the intricacies of the systemd init system itself in a future post!)

    • Integrated Logging with Journalctl: All output and status information from systemd timer-triggered services are meticulously logged in the systemd journal, making debugging and monitoring significantly easier (journalctl -u your-service.service).
    • Robust Dependency Management: systemd allows you to define intricate dependencies between services. A timer can trigger a service that requires another service to be active, ensuring proper execution order.
    • Persistent Timers (Missed Job Handling): With the Persistent=true option, systemd timers will execute a missed job immediately upon system boot, ensuring critical tasks are never truly skipped.
    • Consistent Execution Environment: systemd services run in a well-defined environment, reducing surprises due to differing PATH or other variables. You can explicitly set environment variables within the service unit.
    • Flexible Triggering Mechanisms: Beyond simple calendar-based schedules (like cron), systemd timers support monotonic timers (e.g., “5 minutes after boot”) and can be combined with other systemd unit types for event-driven automation.
    • Concurrency Control: systemd inherently manages service states, preventing multiple instances of the same service from running simultaneously unless explicitly configured to do so.
    • Granular Control: Timers offer second-resolution scheduling (with AccuracySec=1us), allowing for much more precise control than cron‘s minute-level resolution.
    • Randomized Delays: RandomizedDelaySec can be used to prevent “thundering herd” issues where many timers configured for the same time might all fire simultaneously, potentially overwhelming the system.

    Designing Your Systemd Timers: A Two-Part Harmony

    systemd timers operate in a symbiotic relationship with systemd service units. You typically create two files for each scheduled task:

    1. A Service Unit (.service file): This defines what you want to run (e.g., a script, a command).
    2. A Timer Unit (.timer file): This defines when you want the service to run.

    Both files are usually placed in /etc/systemd/system/ for system-wide timers or ~/.config/systemd/user/ for user-specific timers.

    The Service Unit (your-task.service)

    This file is a standard systemd service unit. A basic example:

    [Unit]
    Description=My Daily Backup Service
    Wants=network-online.target # Optional: Ensure network is up before running
    
    [Service]
    Type=oneshot # For scripts that run and exit
    ExecStart=/usr/local/bin/backup-script.sh # The script to execute
    User=youruser # Run as a specific user (optional, but good practice)
    Group=yourgroup # Run as a specific group (optional)
    # Environment="PATH=/usr/local/bin:/usr/bin:/bin" # Example: set a custom PATH
    
    [Install]
    WantedBy=multi-user.target # Not strictly necessary for timers, but good for direct invocation
    

    Strategic Design Considerations for Service Units:

    • Type=oneshot: Ideal for scripts that perform a task and then exit.
    • ExecStart: Always use absolute paths for your scripts and commands to avoid environment-related issues.
    • User and Group: Run services with the least necessary privileges. This enhances security.
    • Dependencies (Wants, Requires, After, Before): Leverage systemd‘s powerful dependency management. For example, Wants=network-online.target ensures the network is active before the service starts.
    • Error Handling within Script: While systemd provides good logging, your scripts should still include robust error handling and exit with non-zero status codes on failure.
    • Output: Direct script output to stdout or stderr. journald will capture it automatically. Avoid sending emails directly from the script unless absolutely necessary; systemd‘s logging is usually sufficient.

    The Timer Unit (your-task.timer)

    This file defines the schedule for your service.

    [Unit]
    Description=Timer for My Daily Backup Service
    Requires=your-task.service # Ensure the service unit is loaded
    After=your-task.service # Start the timer after the service is defined
    
    [Timer]
    OnCalendar=daily # Run every day at midnight (default for 'daily')
    # OnCalendar=*-*-* 03:00:00 # Run every day at 3 AM
    # OnCalendar=Mon..Fri 18:00:00 # Run weekdays at 6 PM
    # OnBootSec=5min # Run 5 minutes after boot
    Persistent=true # If the system is off, run immediately on next boot
    RandomizedDelaySec=300 # Add up to 5 minutes of random delay to prevent stampedes
    
    [Install]
    WantedBy=timers.target # Essential for the timer to be enabled at boot
    

    Strategic Design Considerations for Timer Units:

    • OnCalendar: This is your primary scheduling mechanism. systemd offers a highly flexible calendar syntax (refer to man systemd.time for full details). Use systemd-analyze calendar "your-schedule" to test your expressions.
    • OnBootSec: Useful for tasks that need to run a certain duration after the system starts, regardless of the calendar date.
    • Persistent=true: Crucial for reliability! This ensures your task runs even if the system was powered off during its scheduled execution time. The task will execute once systemd comes back online.
    • RandomizedDelaySec: A best practice for production systems, especially if you have many timers. This spreads out the execution of jobs that might otherwise all start at the exact same moment.
    • AccuracySec: Defaults to 1 minute. Set to 1us for second-level precision if needed (though 1s is usually sufficient).
    • Unit: This explicitly links the timer to its corresponding service unit.
    • WantedBy=timers.target: This ensures your timer is enabled and started automatically when the system boots.

    Implementation and Management

    1. Create the files: Place your .service and .timer files in /etc/systemd/system/.
    2. Reload systemd daemon: After creating or modifying unit files: sudo systemctl daemon-reload
    3. Enable the timer: This creates a symlink so the timer starts at boot: sudo systemctl enable your-task.timer
    4. Start the timer: This activates the timer for the current session: sudo systemctl start your-task.timer
    5. Check status: sudo systemctl status your-task.timer; sudo systemctl status your-task.service
    6. View logs: journalctl -u your-task.service
    7. Manually trigger the service (for testing): sudo systemctl start your-task.service

    Conclusion

    While cron served its purpose admirably for many years, systemd timers offer a modern, robust, and integrated solution for scheduling tasks on Linux systems. By embracing systemd timers, you gain superior logging, dependency management, missed-job handling, and greater flexibility, leading to more reliable and maintainable automation. It’s a strategic upgrade that pays dividends in system stability and ease of troubleshooting. Make the switch and experience the power of a truly systemd-native approach to scheduled tasks.

  • Upgrading Raspbian 8 (Jessie) to Raspbian 9 (Stretch)

    I decided to upgrade my oldest Raspberry Pi to the latest Raspbian. Since I was two releases behind, I decided to do it step-by-step. Today I updated from 8 – 9. I plan. to perform similar steps to upgrade 9 – 10.

    Following are the quick sequence of steps I followed to perform the upgrade. This is a Model B Rev 2 Pi, so was considerably slow to update and took me more than 4 hours to complete.

    Step 1 – Prepare The System For Upgrade

    Apply the latest updates to the system.

    $ sudo apt update && sudo apt upgrade -y && sudo apt-get dist-upgrade -y

    Next step is to search for packages which have been only partially installed on the system using dpkg -C command.

    $ sudo dpkg -C

    The dpkg may indicate what needs to be done with these. I did not find anything under this category, which was good. In last, I ran apt-mark showhold command to get a list of all packages which have been marked as hold.

    $ sudo apt-mark showhold

    While I did not get any packages in this list, but if there are any, we are expected to resolve this before proceedig to step 2.

    Stpe 2 – Prepare the APT System for Upgrade

    $ sudo sed -i 's/jessie/stretch/g' /etc/apt/sources.list
    $ sudo sed -i 's/jessie/stretch/g' /etc/apt/sources.list.d/raspi.list
    $ echo 'deb http://archive.raspberrypi.org/debian/ stretch main' >> /etc/apt/sources.list

    I am updating only the two files but if your system has any other source files, then you need to update them appropriately as well. A list of such files can be found using – grep -lnr jessie /etc/apt

    In addition to this I also removed the package apt-listchange which displays what changed in the new version of the Debian package as compared to the version currently installed on the system. This is expected to speed-up the entire process. This is not mandatory, so you can skip it.

    # optional step
    $ sudo apt-get remove apt-listchange 

    Step 3 – Perform The Upgrade and Cleanup

    As a last step initiate the upgrade process. This is the time where you can just leave the system for few hours.

    $ sudo apt update && sudo apt upgrade -y && sudo apt-get dist-upgrade -y

    I faced issues with chromium-browser and at the last command (dist-upgrade), the dpkg bailed out with a message indicating archive corruption of chromium-browser package. Since I am at Run Level 3, and do not need chromium on the headless pi, I decided to remove the following three packages. In any case in the absence of chromium, the debian system will automatically use update-alternatives and choose epiphany-browser to satisfy gnome-www-browser requirement.

    $ sudo apt-get remove chromium-browser chromium-browser-l10n rpi-chromium-mods

    After removing the chromium browser, I did another round of update, upgrade and dist-upgrade, just to make sure before initiating the cleanup as below –

    $ sudo apt-get autoremove -y && sudo apt-get autoclean

    The new OS version can be verified by

    $ cat /etc/debian_version;cat /etc/os-release

    I also took this opportunity to update the firmware of the raspberry pi by running the following command. Please note this step is absolutely optional and it is recomended also that do not perform this unless you know what you are doing or you are being asked by a support person.

    $ sudo rpi-update

  • Raspberry Pi – rsyslog fixes on Raspbian 8 (Jessie)

    Raspberry Pi – rsyslog fixes on Raspbian 8 (Jessie)

    One of my Raspberry Pi (Raspberry Pi Model B Rev 2) is running quite old versio of Rasbian – although fully updated and patched. Today while checking the syslog on my raspberry pi, I noticed the following error which was very frequently – almost every minute and thus was filling up the syslog.

    Dec 24 20:59:35 rads rsyslogd-2007: action 'action 17' suspended, next retry is Thu Dec 24 21:01:05 2020 [try http://www.rsyslog.com/e/2007 ]

    Thanks to logrotate I was not in an immediate need for action, but still I thought it will be better to fix this – atleast that will reduce the write and increase life of my SD Card.

    The URL at the end of the message was very helpful. According to the specified URL this message simply means that rsyslog.conf contains the instruction to write to the xconsole pipe, but this pipe is never read. on editing the /etc/rsyslog file, the following section can be commented out or removed completely.

    daemon.*;mail.*;\        news.err;\        *.=debug;*.=info;\        *.=notice;*.=warn       |/dev/xconsole

    A simple systemctl restart rsyslog after that will fix the issue.

    I did not see this issue on my other Raspberry Pi which runs Raspbian based on Debian Buster (Debian 10). I checked the /etc/rsyslog.conf on that and could not find the offending lines there. So my understanding is that this issue is with Raspbian based on Jessie.

  • Apt Pinning in Raspbian

    Quite sometime back I wrote a blog entry on apt-pinning to mix multiple repositories in debian and prioritize them. Recently, I felt the need to do the same on my raspberry pi.

    I use rsnapshot to backup remote systems. Rsnapshot has an associated perl script which is meant to send beautiful reports via email at the end of the backup. The script in the version which came with raspbian was broken (1.3.1-4+deb8u1) and I needed 1.4.2-1, which is available in Debian Stretch.

    Following my earlier post, I performed the following steps to perform the installation of the required version without impacting the rest of the system. As you can see that the priority of Jessie is higher than that of Stretch, which will ensure that the system does not get messed up when you do an upgrade.

    # Create the preferences file for jessie and stretch as shown below
    $ sudo vi /etc/apt/preferences.d/jessie.pref
    Package: *
    Pin: release n=jessie
    Pin-Priority: 900
    
    $ sudo vi /etc/apt/preferences.d/stretch.pref
    Package: *
    Pin: release a=stretch
    Pin-Priority: 750
    
    # Define the package sources for both jessie and stretch
    $ sudo vi /etc/apt/sources.list.d/jessie.list
    deb http://mirrordirector.raspbian.org/raspbian/ jessie main contrib non-free rpi
    
    $ sudo vi /etc/apt/sources.list.d/stretch.list
    deb http://mirrordirector.raspbian.org/raspbian/ stretch main contrib non-free rpi
    
    # Refresh the cache and sources list
    $ sudo apt-get update
    
    # Install the desired package by specifying the repository from which 
    # it has to be installed
    $ sudo apt-get install rsnapshot -t stretch

    Please be careful before performing these steps in a production system.